6.7
Maintenance
3
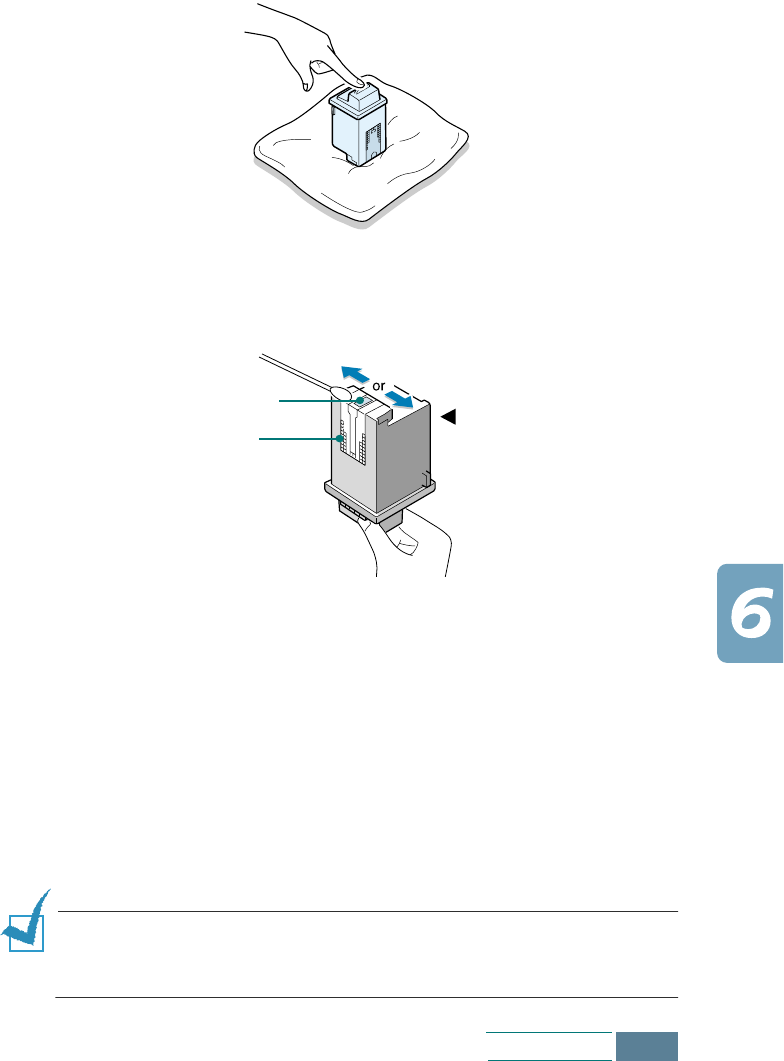
Use a clean cloth, dampened with water only, to gently clean
the entire copper coloured area, including the nozzles and
contacts.
To dissolve any dried ink, place the cartridge on a heavy
damp cloth as shown below and push the cartridge with light
pressure to let the nozzles come in contact with the cloth for
about three seconds. Then gently blot and wipe dry.
If you are cleaning a colour print cartridge, be especially
careful to wipe the nozzles in only one direction so the
colours do not mix.
4
Allow the copper-coloured area to dry.
5
Reinstall the print cartridges and close the cartridge door.
The display shows “CARTRIDGE CHANGED? NO.” Press
Enter. The display returns to Standby mode.
6
Print a cleaning page and examine the cleaning pattern by
following the instructions on page 6.3. If the line is still
broken, clean the print cartridge holder contacts in your
product.
NOTE:
Once the cartridges are removed and installed, cartridge
alignment may be required. After you clean the cartridge, if
necessary, align the cartridges.
Nozzles
Contact area
Wipe in only one
direction.


