Chapter 4 Maintaining the Sun Fire X2250 Server 4-47
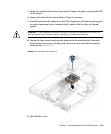
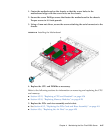
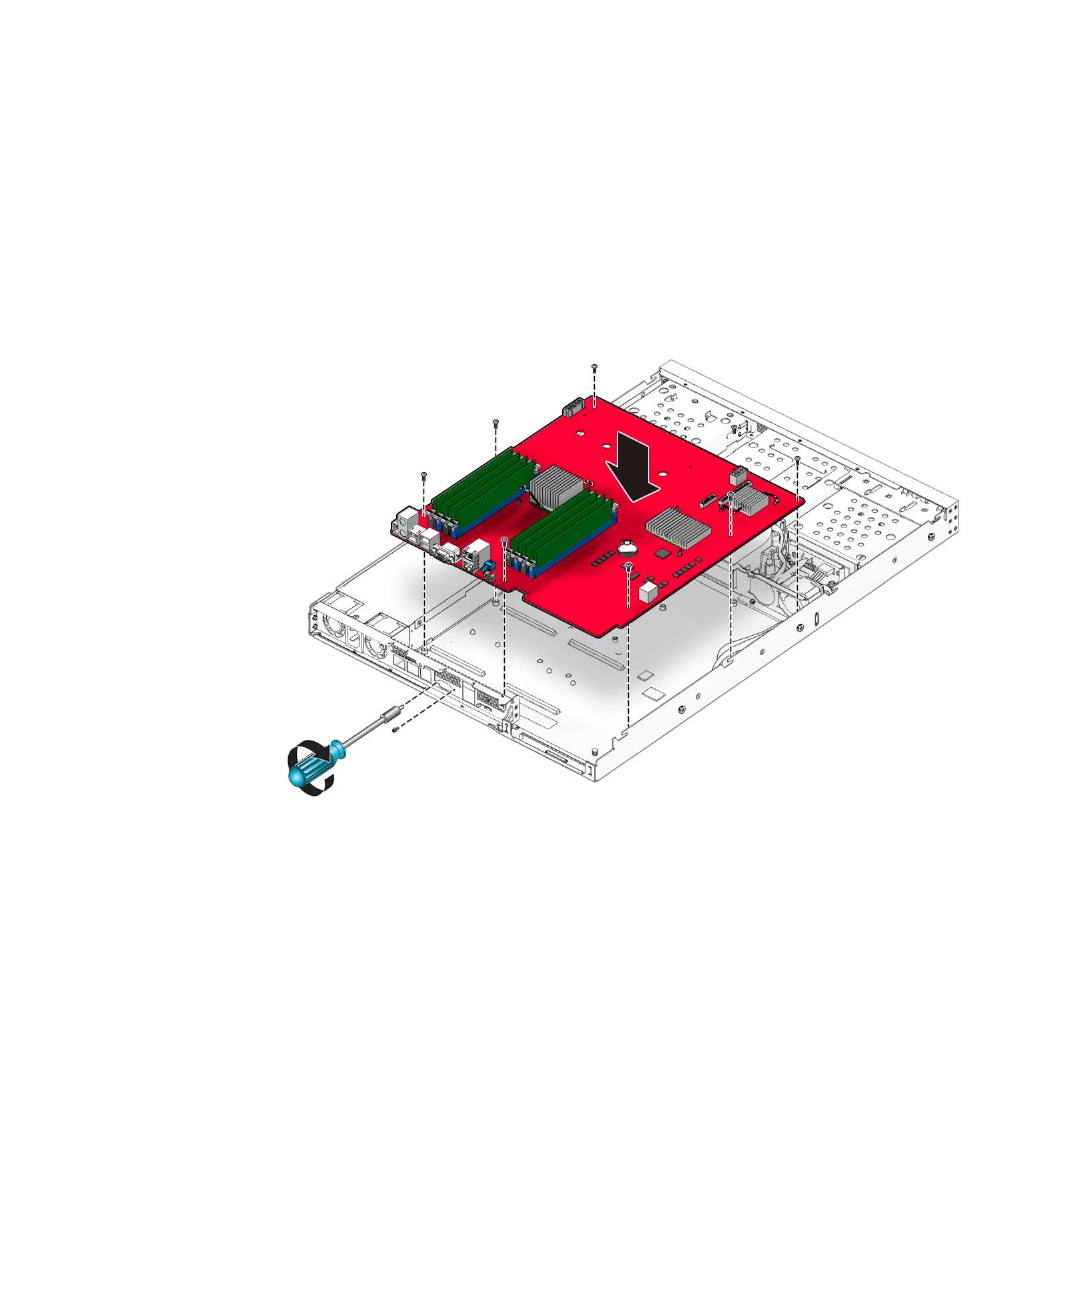
1. Center the motherboard on the chassis so that the screw holes in the
motherboard align with the screw holes on the chassis.
2. Secure the seven Phillips screws that fasten the motherboard to the chassis.
Torque screws to 8-9 inch-pounds.
3. Using a 5-mm nut driver, secure the screws attaching the serial connector to the
chassis.
FIGURE 4-40 Installing the Motherboard
4. Replace the CPU and DIMMs as necessary.
Refer to the following sections for information on removing and replacing the CPU
and memory:
■ Section 4.5.12, “Replacing a CPU and Heatsink” on page 4-36
■ Section 4.5.10, “Replacing Memory Modules” on page 4-28
5. Replace the PCIe card riser assembly and air duct.
■ See Section 4.5.2, “Replacing the PCIe Card and Riser Assembly” on page 4-9.
■ Section 4.5.6, “Replacing the Air Duct” on page 4-20


