


4-78 Service Manual
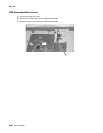
Upper front cover hinge assembly removal
1. Remove the upper front cover. See “Upper front cover removal” on page 4-11.
2. Remove the laser cover assembly. See “Laser cover removal” on page 4-19.
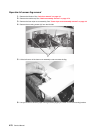
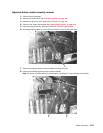
3. Remove the C-clips (A) from the upper front cover hinge assembly left and right hinge pins, and remove the
pins. Note the pin orientation and the C-clip location on the inside of each hinge.
4. Detach the two springs (B) from the upper front cover hinges.
5. Detach spring (C) from the left side of the hinge assembly.
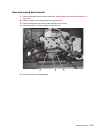
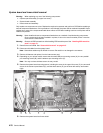
6. Remove the cover closed switch assembly.
7. Disconnect the operator panel cable from the operator panel board.
8. Raise the upper front cover hinge assembly to a position that lets you lift the left pivot arm from the
mounting bracket (D).
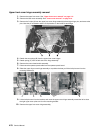
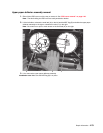
9. Lift the left pivot arm from the bracket, and move the upper cover hinge assembly toward the left to clear
the right upper cover pivot arm from the mounting bracket.
10. Remove the upper front cover hinge assembly.
A BBDC