


Section 4 Novell NetWare Network Configuration
PocketPro 100S Administrator’s Guide -- Document #40165-110 Rev. A 4-66
Configuring the
Print Server and
Print Queue
Using NWAdmin,
WebXAdmin, or
JetAdmin (NDS
Remote Printer
Mode)
To configure the TROY PocketPro 100S for remote printer mode with NWADMIN (NetWare Administrator
utility) and WebXAdmin, or JetAdmin, perform the following steps:
1. Make sure that the PSERVER NLM (NetWare Loadable Module) is loaded on your file server and that you
are logged in as ADMIN in NDS mode on the NetWare 4.xx or later file server.
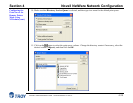
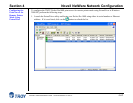
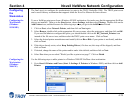
2. Start NWADMIN by double clicking on the icon. Select the desired Container Object (Organizational Unit)
that will contain the new printer.
3. Select Object from the menu bar and then Create. When you get the New Object menu, select Printer, and
then click on OK.
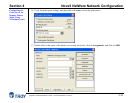
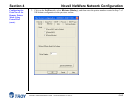
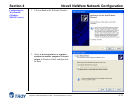
4. Enter the name of the printer, and then select Create.
5. Double-click on the name of your PSERVER NLM. Click on Assignments, and then click on Add...
6. If necessary, change the directory context. Select the printer you created, and then click on OK. Note the
number of the printer, as you will use this later, and then click on OK.
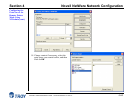
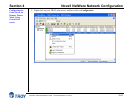
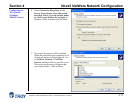
7. Select the desired Container Object (Organizational Unit) that will contain the default print queue, and then
click on Object and Create to get New Object menu.
8. Select Print Queue, and then OK. Make sure that Directory Service Queue is selected, and then type in a
name for the default print queue.
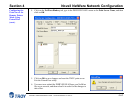
9. Click on the button to select the print queue volume. Change the directory context if necessary, select the
desired volume (Objects), and then click on OK. Click on Create to create the print queue.
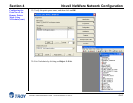
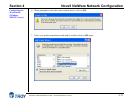
10. Change context if required, and then double-click the name of the printer you created previously.
11. Click on Assignments, and then click on Add..
12. Change context if necessary, and select the print queue you created. Click OK twice, and exit NWADMIN.