


Section 4 Novell NetWare Network Configuration
PocketPro 100S Administrator’s Guide -- Document #40165-110 Rev. A 4-68
Configuring the
Print Server and
Print Queue
Using
PCONSOLE and
XCONFIG (cont.)
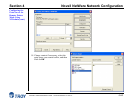
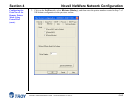
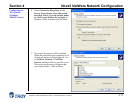
The following steps apply to configuring a remote printer with NDS support on NetWare 6.xx systems:
a. Select Print Servers from the PCONSOLE menu, and then select the name of the PSERVER NLM on
your host computer.
b. Select Printers.
c. Press INSERT to get Object, Class menu.
d. Press INSERT and enter the Printer Name (any unique name is OK).
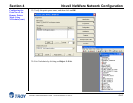
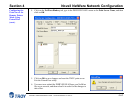
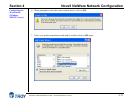
e. Highlight the printer name and press ENTER twice to get Printer Configuration Menu.
f. PCONSOLE will assign a Printer Number. Remember this number, since it will be used later.
g. Highlight Print Queues Assigned and press ENTER and then INSERT to get a list of available queues.
h. Highlight the name of the print queue you wish to assign to the remote printer and press ENTER.
i. The other settings in the menu are not required. Push ESCAPE several times to exit PCONSOLE.
j. Skip to Step 5 below.
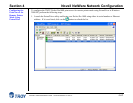
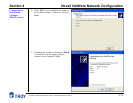
The following steps apply to configuring a remote printer on NetWare 3.xx systems:
a. Select Print Server Information from the PCONSOLE main menu and choose the name of the
PSERVER NLM.
b. Select Print Server Configuration and then Printer Configuration. Select any "Not Installed" printer
and press Enter. Remember the number of this printer; it will be used later in the configuration process.
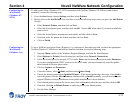
c. If desired, type in a new name for the printer.
d. Go to Type, press ENTER, highlight Remote Other/Unknown and press ENTER again. The other
settings in this menu are not required.
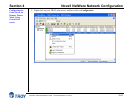
e. Push ESCAPE and save the changes.
f. Push ESCAPE and select Queues Serviced by Printer.
g. Highlight the printer name that you just configured and press ENTER.
h. Press INSERT, choose the desired print queue, and press ENTER (you can accept the default priority).
i. Press ESCAPE several times to exit PCONSOLE.
j. Proceed to Step 5 below (next page).