


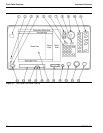
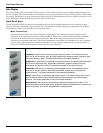

Front Panel Overview Instrument Overview
3-10 MS278XB OM
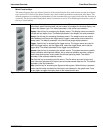
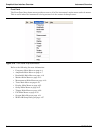
DVD-ROM/CD-RW Drive
The DVD-ROM/CD-RW drive is capable of reading digitally stored data on a variety of CD media. The drive is
also capable of writing digital data to CD-R and CD-RW media. You can use either 12 cm or 8 cm diameter
media. The DVD-ROM/CD-RW drive supports ATA Packet Interface (ATAPI), revision 2.6. Performance
specifications for the drive are listed in Table 3-4.
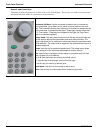
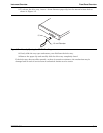
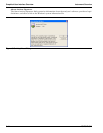
Manually Ejecting the DVD-ROM/CD-RW Drive Tray
If the CD-RW drive tray fails to eject, a paper clip can be used to release the tray for manual ejection.
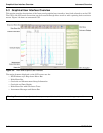
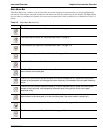
Table 3-4. DVD-ROM/CD-RW Performance Specifications
Function Specification
Compatible Read Disk Types CD-DA, CD+(E)G, CD-MIDI, CD-TEXT, CD-ROM, CD-ROM XA, MIXED MODE,
CD-I, CD-I BRIDGE (PHOTO-CD, VIDEO-CD), CD-R, CD-RW, and
MULTISESSION (PHOTO-CD, CD EXTRA, PORTFOLIO), DVD-ROM (DVD-5,
DVD-9, DVD-10, DVD-18), DVD-R (VER 1.0 and 2.0), DVD-RW (VER 1.1),
DVD-RAM (VER 2.1)
Compatible Write Disk Types CD-R and CD-RW of types listed above
Compatible Write Format Disk at Once
Track at Once
Session at Once
Packet Write
Data Capacity (write) Mode 1: 2048 Bytes/Block
656.5 Megabytes/Disk
Mode 2: 2336 Bytes/Block
748.8 Megabytes/Disk
Access Time DVD-ROM: 100 ms
DVD-RAM: 170 ms
CD-ROM: 90 ms
Maximum Read Speed CD-ROM: 24 Times
DVD-ROM: 8 Times
Maximum Sustained Data
Transfer Rate (read)
CD-ROM Mode 1: 3600 Kilobytes/sec.
CD-ROM Mode 2: 4104 Kilobytes/sec.
DVD-ROM Single: 10,820 Kilobytes/sec.
Maximum Write Speed CD-R: 24 Times
CD-RW: 4 Times
(10 times for high speed CD-RW media)
Maximum Rotational Speed 5100 RPM (CD-ROM, CD-R)
Data Buffer Capacity 2 Megabytes
Caution: Do not use storage media that is of the incorrect type, such as improperly formatted CDs.
Do not insert more than one disk at a time into the drive tray.
Do not use excessive force when loading or ejecting disks.
Failure to follow these cautions could result in loss of data or damage to the equipment.
Warning: Before proceeding, power down the instrument and remove the power cord from the rear panel power
receptacle.