72-71
Cisco ASA 5500 Series Configuration Guide using ASDM
Chapter 72 Configuring Clientless SSL VPN
Customizing the Clientless SSL VPN User Experience
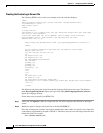
Step 3 Insert the special HTML code below. This code contains the Cisco functions, described earlier, that
inject the login form and language selector onto the screen.
<body onload="csco_ShowLoginForm('lform');csco_ShowLanguageSelector('selector')">
<table>
<tr><td colspan=3 height=20 align=right><div id="selector" style="width:
300px"></div></td></tr>
<tr><td></td><td></td><td></td></tr>
<tr>
<td height="379"></td>
<td height="379"></td>
<td align=middle valign=middle>
<div id=lform >
<p> </p>
<p> </p>
<p> </p>
<p>Loading...</p>
</div>
</td>
</tr>
<tr>
<td width="251"></td>
<td width="1"></td>
<td align=right valign=right width="800">
<img border="1" src="/+CSCOU+/asa5500.jpg" width="660" height="220" align="middle">
</td></tr>
</table>
Importing the File and Images
Follow these steps to import your HTML file and any images to the ASA:
Step 1 Import the file and images as Web Content.
Step 2 Go to Clientless SSL VPN Access > Portal > Web Contents.
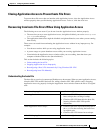
Step 3 Click Import (1). The Import Web Content window displays. Enter the Source information (2). In the
Destination area, select No for Require Authentication to access its content (3). This ensures the files are
stored in the area of flash memory accessible to users before authentication.
Step 4 Import any images used by the file as Web Content using the same window.
Configuring the Security Appliance to use the Custom Login Screen
Follow these steps to enable the ASA to use the new login screen in a customization object:
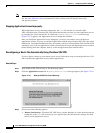
Step 1 Select a customization object. Go to Clientless SSL VPN Access > Portal > Customization. Select a
customization object in the table and click Edit. The Edit Customization Object window displays.
Step 2 In the navigation pane, select Logon Page.
Step 3 Choose Replace pre-defined logon page with a custom page.
Step 4 Click Manage to import your logon page file. The Import Web Content window displays.


