


20-16
Cisco ASA 5500 Series Configuration Guide using ASDM
Chapter 20 Configuring Objects
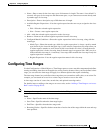
Configuring Time Ranges
Add/Edit Time Range
The Configuration > Global Objects > Time Ranges > Add/Edit Time Range dialog box lets you define
specific times and dates that you can attach to an action. For example, you can attach an access list to a
time range to restrict access to the ASA. The time range relies on the system clock of the ASA; however,
the feature works best with NTP synchronization. For detailed steps on adding a time range to an IPv6
ACL, see the “Configuring Access Rules” section on page 37-7.
Adding a Time Range to an Access Rule
You can add a time range to an ACL to specify when traffic can be allowed or denied through an
interface.
To add a time range to an ACL, perform the following steps:
Step 1 Choose Configuration > Firewall > Access Rules.
Step 2 Choose the access list type by clicking the IPv4 Only, the IPv6 Only, or the IPV6 and IPv6 radio
button.
Step 3 Click Add. The Add Access Rule window appears.
Step 4 From the Interface drop down list, choose the desired interface.
The management interface is for management only and cannot be used to configure an access rule.
Step 5 Click Permit or Deny to permit or deny the action.
Step 6 In the Source field, enter an IP address.
Step 7 In the Destination field, enter an IP address.
Step 8 Select the service type.
Step 9 Click More Options to expand the list.
Step 10 To the right of the Time Range drop down list, click the browse button.
The Browse Time Range window appears.
Step 11 Click Add.
The Add Time Range window appears.
Step 12 In the Time Range Name field, enter a time range name, with no spaces.
Step 13 Choose the Start Time and the End Time by doing one of the following:
a. Allow the default settings, in which the Start Now and the Never End radio buttons are checked.
b. Apply a specific time range by clicking the Start at and End at radio buttons and selecting the
specified start and stop times from the lists.
The time range is inclusive of the times that you enter.
Step 14 (Optional) To specify additional time constraints for the time range, such as specifying the days of the
week or the recurring weekly interval in which the time range will be active, click Add, and do one of
the following:
a. Click Specify days of the week and times on which this recurring range will be active, and
choose the days and times from the lists, and click OK.
b. Click Specify a weekly interval when this recurring range will be active, and choose the days
and times from the lists, and click OK.