


31-11
Cisco ASA 5500 Series Configuration Guide using ASDM
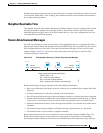
Chapter 31 Configuring IPv6 Neighbor Discovery
Adding an IPv6 Static Neighbor
Step 7 To define a prefix lifetime expiration date, click the Lifetime Expiration Date radio button, and specify
the following:
a. Choose a valid month and day from the drop-down list, and then enter a time in hh:mm format.
b. Choose a preferred month and day from the drop-down list, and then enter a time in hh:mm format.
Step 8 Click OK to save your settings.
The Interface IPv6 Prefixes Address field appears with the preferred and valid dates.
Adding an IPv6 Static Neighbor
Make sure that IPv6 is enabled on at least one interface before trying to add a neighbor, or ASDM returns
an error message indicating that the configuration failed.
For information about configuring IPv6 addresses, see the “Configuring IPv6 Addresses on an Interface”
section on page 31-9.
To add an IPv6 static neighbor, perform the following steps:
Step 1 Choose Configuration > Device Management > Advanced > IPv6 Neighbor Discovery Cache.
Step 2 Click Add.
The Add IPv6 Static Neighbor dialog box appears.
Step 3 From the Interface Name drop-down list, choose an interface on which to add the neighbor.
Step 4 In the IP Address field, enter the IPv6 address that corresponds to the local data-link address, or click
the ellipsis (...) to browse for an address.
If an entry for the specified IPv6 address already exists in the neighbor discovery cache—learned
through the IPv6 neighbor discovery process—the entry is automatically converted to a static entry.
Step 5 In the MAC address field, enter the local data-line (hardware) MAC address.
Step 6 Click OK.
Note Before you apply the changes and save the configuration, you can click Reset to cancel any
changes and restore the original values.
Step 7 Click Apply to save the running configuration.
Editing Static Neighbors
To edit a static neighbor that is defined in your configuration, perform the following steps:
Step 1 Choose Configuration > Device Management > Advanced > IPv6 Neighbor Discovery Cache.
Step 2 Select the neighbor from the main pane, and click Edit.
The Edit IPv6 Static Neighbor dialog box appears.