


38-21
Cisco ASA 5500 Series Configuration Guide using ASDM
Chapter 38 Configuring AAA Servers and the Local Database
Configuring AAA
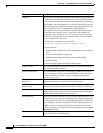
The names of frequently mapped Cisco LDAP attributes and the type of user-defined attributes that they
would commonly be mapped to include the following:
• IETF-Radius-Class (Group_Policy in ASA version 8.2 and later)—Sets the group policy based on
the directory’s department or user group (for example, Microsoft Active Directory memberOf)
attribute value. The group-policy attribute replaced the IETF-Radius-Class attribute with ASDM
version 6.2/ASA version 8.2 or later.
• IETF-Radius-Filter-Id—An access control list or ACL applied to VPN clients, IPsec, and SSL.
• IETF-Radius-Framed-IP-Address—Assigns a static IP address assigned to a VPN remote access
client, IPsec, and SSL.
• Banner1—Displays a text banner when the VPN remote access user logs in.
• Tunneling-Protocols—Allows or denies the VPN remote access session based on the access type.
Note A single ldapattribute map may contain one or many attributes. You can only assign one ldap
attribute to a specific LDAP server.
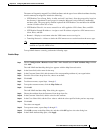
To map LDAP features correctly, perform the following steps:
Detailed Steps
Step 1 Choose Configuration > Remote Access VPN > AAA Local Users > LDAP Attribute Map, and then
click Add.
The Add LDAP Attribute Map dialog box appears with the Map Name tab active.
Step 2 In the Name field, add a name for the map.
Step 3 In the Customer Name field, add the name of the corresponding attribute of your organization.
Step 4 From the Cisco Name drop-down list, choose an attribute.
Step 5 Click Add.
Step 6 To add more names, repeat Steps 1 through 5.
Step 7 To map the customer names, click the Map Value tab.
Step 8 Click Add.
The Add LDAP Attributes Map Value dialog box appears.
Step 9 Choose the attribute from the Customer Name drop-down list.
Step 10 In the Customer Value field, add the value for this attribute.
Step 11 In the Cisco Value field, add the Cisco value to which the value specified in the previous step maps.
Step 12 Click Add.
The values are mapped.
Step 13 To map more names, repeat Steps 8 through 12.
Step 14 Click OK to return to the Map Value tab, and then click OK again to close the dialog box.
Step 15 In the LDAP Attribute Map pane, click Apply.