


27-13
Cisco ASA 5500 Series Configuration Guide using ASDM
Chapter 27 Configuring OSPF
Customizing OSPF
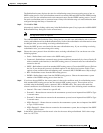
Step 6 Enter the network mask in the Network Mask field for the IP address or host to be added to the area. If
adding a host, choose the 255.255.255.255 mask.
Step 7 In the Authentication area, click the None radio button to disable OSPF area authentication.
Step 8 Enter a value in the Default Cost field to specify a default cost for the OSPF area.
Valid values range from 0 to 65535. The default value is 1.
Step 9 Click OK.
Defining Static OSPF Neighbors
You need to define static OSPF neighbors to advertise OSPF routes over a point-to-point, non-broadcast
network. This feature lets you broadcast OSPF advertisements across an existing VPN connection
without having to encapsulate the advertisements in a GRE tunnel.
Before you begin, you must create a static route to the OSPF neighbor. See Chapter 25, “Configuring
Static and Default Routes,” for more information about creating static routes.
To define a static OSPF neighbor, perform the following steps:
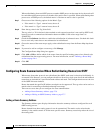
Step 1 In the main ASDM window, choose Configuration > Device Setup > Routing > OSPF > Static
Neighbor.
Step 2 Click Add or Edit.
The Add/Edit OSPF Neighbor Entry dialog box appears. This dialog box lets you define a new static
neighbor or change information for an existing static neighbor. You must define a static neighbor for
each point-to-point, nonbroadcast interface. Note the following restrictions:
• You cannot define the same static neighbor for two different OSPF processes.
• You need to define a static route for each static neighbor.
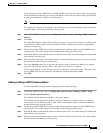
Step 3 From the OSPF Process drop-down list, choose the OSPF process associated with the static neighbor. If
you are editing an existing static neighbor, you cannot change this value.
Step 4 In the Neighbor field, enter the IP address of the static neighbor.
Step 5 In the Interface field, choose the interface associated with the static neighbor. If you are editing an
existing static neighbor, you cannot change this value.
Step 6 Click OK.
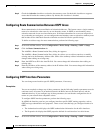
Configuring Route Calculation Timers
You can configure the delay time between when OSPF receives a topology change and when it starts an
SPF calculation. You also can configure the hold time between two consecutive SPF calculations.
To configure route calculation timers, perform the following steps:
Step 1 In the main ASDM window, choose Configuration > Device Setup > Routing > OSPF > Setup.
Step 2 Click the Process Instances tab.