62 Installing Optional Accessories
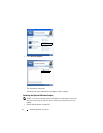
NOTE: The Select Printer window appears in this step when multiple
printer drivers are installed on your computer. In this case, click the name of
this printer listed in Printer Names, and then click OK.
The
Tool Box
opens.
b
Ensure that the
Printer Settings Report
tab is open.
c
Select
Reports
from the list at the left side of the page.
The
Reports
page appears.
d
Click the
System Settings
button.
The system settings report is printed.
10
Confirm
Tray 2 (250 Sheet Feeder)
is listed in the system settings report
under
Printer Options
.
If the feeder is not listed, turn off the printer, unplug the power cable, and re-
install the optional 250-sheet feeder.
11
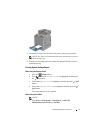
After loading paper in the optional 250-sheet feeder, specify the paper type
from the printer operator panel.
a
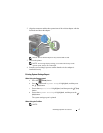
Press the
(Menu)
button.
b
Press button until
System Setup
is highlighted, and then press
the
(Set)
button.
c
Press button until
Tray Settings
is highlighted, and then press
the
(Set)
button.
d
Press button until
Tray 2
is highlighted, and then press the
(Set)
button.
e
Press button until
Paper Type
is highlighted, and then press the
(Set)
button.
f
Press button until the paper type for the optional 250-sheet feeder is
displayed, and then press the
(Set)
button.
g
Confirm that the selected paper type is highlighted, and then press the
(Menu)
button.
12
If you installed the optional 250-sheet feeder after installing the printer
driver, update your driver by following the instructions for each operating
system. If the printer is on a network, update the driver for each client.


