


Installing Summit External Power Supplies
Summit Family Switches Hardware Installation Guide
180
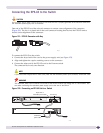
Connecting the EPS-LD to Power
An AC input power cord is not provided with the EPS-LD. For information about power cord
requirements, see “Selecting Power Supply Cords” on page 218.
Make sure the EPS-LD is connected to the switch before you connect the AC power.
CAUTION
The EPS-LD does not have a switch for turning the unit on and off. You disconnect power to the EPS-LD by
removing the plug from the electrical outlet. Make sure that this connection is easily accessible.
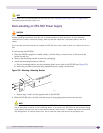
To connect the EPS-LD to power:
1 Connect the AC input power cord to the AC connector on the EPS-LD.
2 Connect the other end of the AC cord to the electrical outlet.
Make sure the electrical outlet is properly grounded.
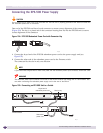
The Power LED on the front of the EPS-LD turns solid green to indicate that it is ready.
Table 28 shows the LED meanings for the EPS-LD power supply.
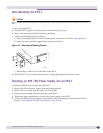
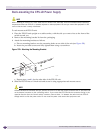
Removing an EPS-LD
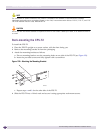
To remove an EPS-LD power supply:
1 Disconnect the AC power by removing the plug from the wall.
2 Disconnect the AC power cord from the EPS-LD unit.
3 Disconnect the cord between the Extreme switch and the EPS-LD.
4 Remove the screws from the EPS-LD mounting brackets.
5 Slide the EPS-LD out of the rack.
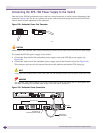
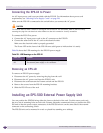
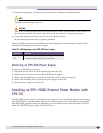
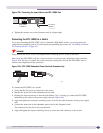
Installing an EPS-500 External Power Supply Unit
You can position the EPS-500 facing either the front or the back of the rack. For this reason, each unit
has two sets of mounting holes on each side. Extreme Networks recommends that you position the EPS-
500 unit so that the power output connectors of the EPS-500 unit are on the same side as the external
connector on the connecting switch.
The EPS-500 unit can be mounted in a rack or placed free-standing on a tabletop.
Table 28: LED Meanings on the EPS-LD
Power LED Indicates
Green, solid The external power supply is operating normally.
Off The external power supply is not connected.