


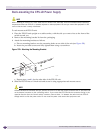

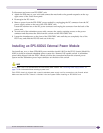

Installing Summit External Power Supplies
Summit Family Switches Hardware Installation Guide
186
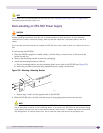
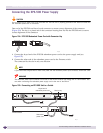
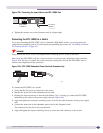
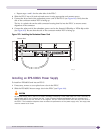
Figure 157: Three-wire Cable Harness
NOTE
Each wire on the harness has been properly marked for proper attachment to the DC power source. Leave these
labels on each lead wire for future reference.
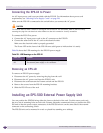
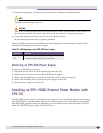
Installing an EPS-150DC Unit into an EPS-T2
WARNING!
The EPS-150DC unit and rack must be connected to protective earth ground.
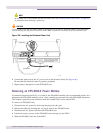
To install an individual EPS-150DC into an EPS-T2:
1 Attach an ESD-preventive wrist strap to your wrist and connect the metal end to the ground
receptacle on the top right corner of the switch front panel.
2 Remove the EPS-150DC from the packing material.
3 Insert the EPS-150DC into the front of the EPS-T2.
4 Tighten the provided thumbscrews to secure the power supply to the tray.
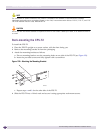
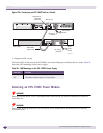
Connecting the DC Wiring Harness to the DC Power Socket on the EPS-150DC
After the DC wiring harness is connected to a permanent DC voltage source by a qualified, licensed
electrician, you can remove, replace, and maintain the EPS-150DC unit without further electrician
assistance.
WARNING!
Always be sure that the DC circuit is de-energized before connecting the DC wiring harness to the DC power socket.
To connect the DC wiring harness to the EPS-150DC unit:
1 Verify that the DC power is turned off at the source.
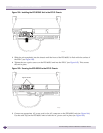
2 Plug the DC cable connector into the DC power supply socket on the rear of the EPS-150DC unit.
The pins must align properly for the cable to completely connect. Do not force the cable into the
socket until the keyway is aligned properly. Refer to Figure 157 for the DC wiring harness connector
and to Figure 158 for the DC power socket location on the rear of the EPS-150DC unit.
EWUG005