


Summit Family Switches Hardware Installation Guide
191
c Repeat steps a and b for the other side of the EPS-C.
4 Slide the EPS-C into a 19-inch rack and secure it using appropriate rack-mount screws.
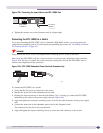
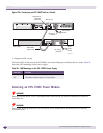
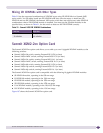
5 Connect the keyed end of the redundant power cord to the EPS-C (see Figure 163). Verify that the
side of the connector marked TOP is facing up.
The key is a plastic tab on the cable connector housing that fits into the EPS-C to ensure correct
alignment of the connector.
6 Connect the other end of the redundant power cord to the Summit X450e-48p or X250e-48p switch
(see Figure 163). Be sure that the side of the connector marked TOP is facing up.
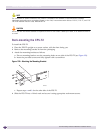
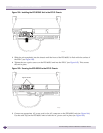
Figure 163: Installing the Redundant Power Cord
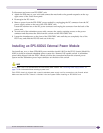
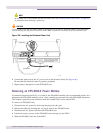
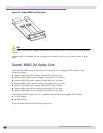
Installing an EPS-600LS Power Supply
To install an EPS-600LS unit into an EPS-C:
1 If necessary, remove a cover plate from a slot in the EPS-C.
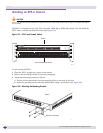
2 Slide the EPS-600LS into an empty slot in the EPS-C (see Figure 164).
CAUTION
Be sure that empty slots in the EPS-C chassis are always covered by a cover plate when not in use. The EPS-C is
shipped with slots 2 and 3 covered and slot 1 open. Extreme Networks recommends that you populate slot 1
with an EPS-600LS unit first, but this is not required. You can install EPS-600LS units into any of the slots in
the EPS-C. The installation sequence does not affect the performance of the power supply units, but empty slots
must be covered at all times.
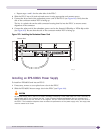
EPS-C_03A
Redundant Power Output
! See Manual
Connect First