


4 - 6
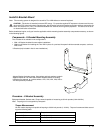
Procedure - RAM Mount Assembly
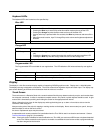
Equipment Needed: Sockets, screwdriver and a Torque wrench capable of measuring to 50 inch pounds (5.64±.56 N/m).
Note: Torquing tool is not supplied by Honeywell. Tools needed to attach the RAM Clamp Mount to the vehicle are not
supplied by Honeywell.
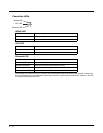
Torque Measurement
You will need a torquing tool capable of torquing to 20 inch pounds (1.10 N/m). Torque all screws and bolts according
to the following table:
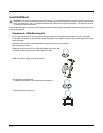
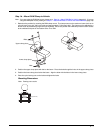
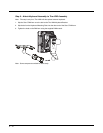
Step 1a – Attach RAM Ball to Vehicle
Note: If you are using the RAM clamp mount, please go to Step 1b – Mount RAM Clamp to Vehicle (page 4-7). If you
are using the RAM plate mount, please go to Step 1c – Attach RAM Plate to Vehicle and Attach RAM Ball (page
4-8).
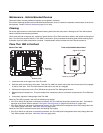
1. Determine the position for mounting the RAM ball base. Be sure to position the RAM bracket to allow access to
the switches and ports on the bottom of the Thor VM2.
2. Attach the RAM ball base to the vehicle mounting surface using three or four 1/4 bolts (not included) or equivalent
fasteners. If the mounting kit includes cone washers, use those as illustrated below.
IMPORTANT: Mount to the most rigid surface available.
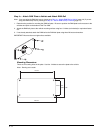
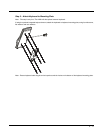
Mounting Dimensions
Note: Drill and tap holes for three 1/4 bolts. Drawing not to scale.
For these nuts… Torque to
10-32 lock nuts 17 - 20 in/lb (0-95 - 1.10 N/m)
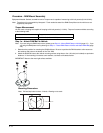
120º120º
60º60º
2.75" / 69.85 mm
3.69" / 93.73 mm