


4 - 14
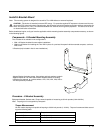
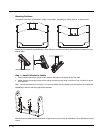
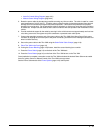
Mounting Positions
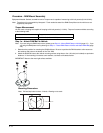
The adapter bracket can be mounted in a high or low position, depending on viewing position, as shown below.
Additionally, the slotted U bracket allows the Thor VM2 to be mounted vertically or tilted forward or backward for best
viewing angle.
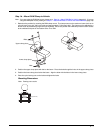
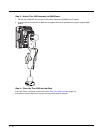
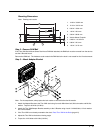
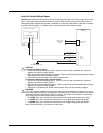
Step 1 - Install U Bracket to Vehicle
1. Position the bracket to allow access to the switches and ports on the bottom of the Thor VM2.
2. Attach the bottom mounting bracket to the vehicle mounting surface using a minimum of four 1/4 bolts (or equiva-
lent) fasteners.
Note: 1/4 bolts and washers not included. It is recommended to use lock washers and flat washers on the fasteners.
IMPORTANT: Mount to the most rigid surface available.
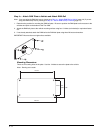
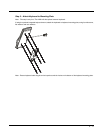
After the bottom bracket has been attached to a rigid surface, you are ready to assemble the Thor VM2 bracket config-
uration.
[