


104
MULTIPLEXER OPERATIONS
Multiplexer board WJ-SXB151 is an optional board.
It enables multiscreen display, electronic zooming, still pic-
ture and multiscreen sequence.
It also enables the operation of Digital Disk Recorder WJ-
HD100 Series or time-lapse VCR, when connected to them.
Note: Before the use, it is necessary to install the
Multiplexer board in the matrix switcher and config-
ure the system through SETUP MENU and WJ-
SX150 Administrator Console. [Refer to p. 34
Installing the Multiplexer Board, p.52 WJ-SX150
SETUP MENU (OSD), and p. 64 WJ-SX150 ADMIN-
ISTRATOR CONSOLE.]
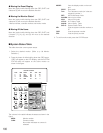
■ Monitoring the Camera Picture
● Multiscreen Segment Switching
Refer to p. 117 Multiscreen Segment Switching for details.
● Multiscreen Sequence
Camera images are switched automatically in a sequence
mode.
The sequence mode (QUAD, 3+1, 8+1) is configurable
through WJ-SX150 Administrator Console.
(Refer to p. 82 Sequence Mode of Multiplexer Mode for
details.)
1. Select the desired monitor and camera. (Refer to p. 90
Monitor Selection and p. 91 Camera Selection.)
The monitor number and camera number will appear on
the LED display.
2. Press the RECORDER button. (Refer to p. 116 Recorder
Mode.) The system will enter the recorder mode.
3. Press the button 7 while holding down the SHIFT but-
ton.
A sequence of multiscreen pictures is displayed
according to the WJ-SX150 Administrator Console's
configuration.
4. To cancel the sequence, press the button 0 while hold-
ing down the SHIFT button.
Note: The sequence mode can also be cancelled by press-
ing a numeric button (corresponding one to the monitor
number), then the CAM (SET) button.
● Still Playback Spot Picture
The spot picture is changed into the still picture.
1. Select the desired monitor and camera number. (Refer
to p. 90 Monitor Selection and Camera Selection.)
The monitor number and camera number will appear on
the LED display.
2. Press the RECORDER button. (Refer to p. 116 Recorder
Mode.) The system will enter the recording mode.
3. Press the PLAY button. (Refer to p. 117 Normal
Playback.) The system will enter the playback mode.
4. Select a camera channel by pressing a numeric button
and then pressing the CAM (SET) button. The selected
camera image will be displayed in a spot picture.
5. Press the button 1 while holding the SHIFT button. The
selected camera image will change into the still picture.
6. To cancel the still picture, press the button 1 while hold-
ing down the SHIFT button again.
Note: Still picture is not available while zooming is acti-
vated.
● Still Multiscreen Picture
Still pictures can also be displayed in a multiscreen.
1. Select the desired monitor and camera number. (Refer
to p. 90 Monitor Selection and Camera Selection.)
The monitor number and camera number will appear on
the LED display.
2. Press the RECORDER button. (Refer to p. 116 Recorder
Mode.) The system will enter the recorder mode.
3. Press the numeric button corresponding to the camera
number.
4. Press the button 1 while holding down the SHIFT but-
ton.
The selected camera image will change into the still
picture.
"STILL" and the camera title alternately blinks on the
monitor.
5. To cancel the still picture, press the button 1 while hold-
ing down the SHIFT button again.
Notes:
• “STILL” does not appear when the still display is set to
OFF.
• When you skip Step 3 and do Step 4, all the channels
displayed in the multiscreen segments will be changed
into the still pictures.