


59
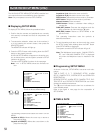
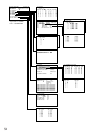
■ CAMERA TITLE
● How to Display
To display this menu on the monitor, move the cursor to 500
CAMERA TITLE in SETUP MENUby moving the joystick to
▼ or ▲. Then, press the CAM (SET) button. The submenu
appears on the monitor.
● How to edit
A camera title is composed of up to 20 characters.
Each camera number is fixed and the subsequent 20 char-
acters are editable.
The characters available here are the following:
ABCDEFGHIJKLMNOPQRSTUVWXYZabcdefghijklmnopqrs
tuvwxyz0123456789!"#$%&'()*+,-./:;=?•_(space)
The factory default settings are same as the illustrations.
1. Edit the camera titles by pressing the NEXT or PREV
buttons.
The NEXT button toggles these characters in this order.
The PREV button toggles these characters in a reverse
order.
Joystick and the CLEAR button are also usable for the
edit. (Refer to p. 52 Displaying SETUP MENU for each
use.)
2. After the configuration, press the MON (ESC) button.
The monitor display will return to the previous menu.
After all the configurations, press the SETUP button while
holding down the SHIFT button. The configuration will be
updated when closing SETUP MENU.
Notes:
• When moving the joystick to ▼ at the bottom of CAM-
ERA TITLE 1 of 2, the monitor will display 2 of 2 (the
next page).
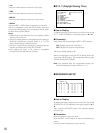
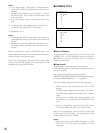
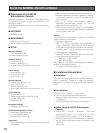
500 CAMERA TITLE 1 of 2
CAM TITLE
1
2
3
4
5
6
7
8
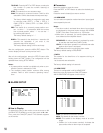
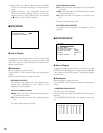
500 CAMERA TITLE 2 of 2
CAM TITLE
9
10
11
12
13
14
15
16
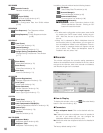
Notes:
• If you repeat Step 1 after setting 4 motion-detection
areas, “NG” will blink at the center of the monitor for two
seconds.
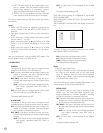
• To reset a motion-detection area, move the “+” mark on
the desired area. Then, press the CLEAR button. The
area will be reset.
• If an area overlaps another one, the newer area will be
reset.
5. To configure the motion-detector areas of another cam-
era channel, press the NEXT or PREV button.
6. Repeat Step 1 to 4.
Notes:
• If you press the CLEAR button before determining four
motion-detection areas, all the areas of the channel will
be reset.
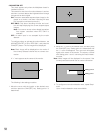
• Setting point 1 and 2 are determined only when the “+”
mark has moved 5 segments both vertically and hori-
zontally.
After the configuration, press the MON (ESC) button. The
motion-detection setting will be memorized and the monitor
display will return to the previous menu.
After all the configurations, press the SETUP button while
holding down the SHIFT button. The configuration will be
updated when closing SETUP MENU.