


User's Guide
Loading Paper 3-3
Selecting a Paper Path
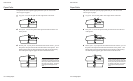
The tractor select indicator indicates which
paper path is selected:
Rear position: In the rear position, the
top or bottom paper path is selected.
Front position: In the front position,
the rear paper path is selected.
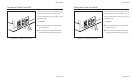
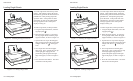
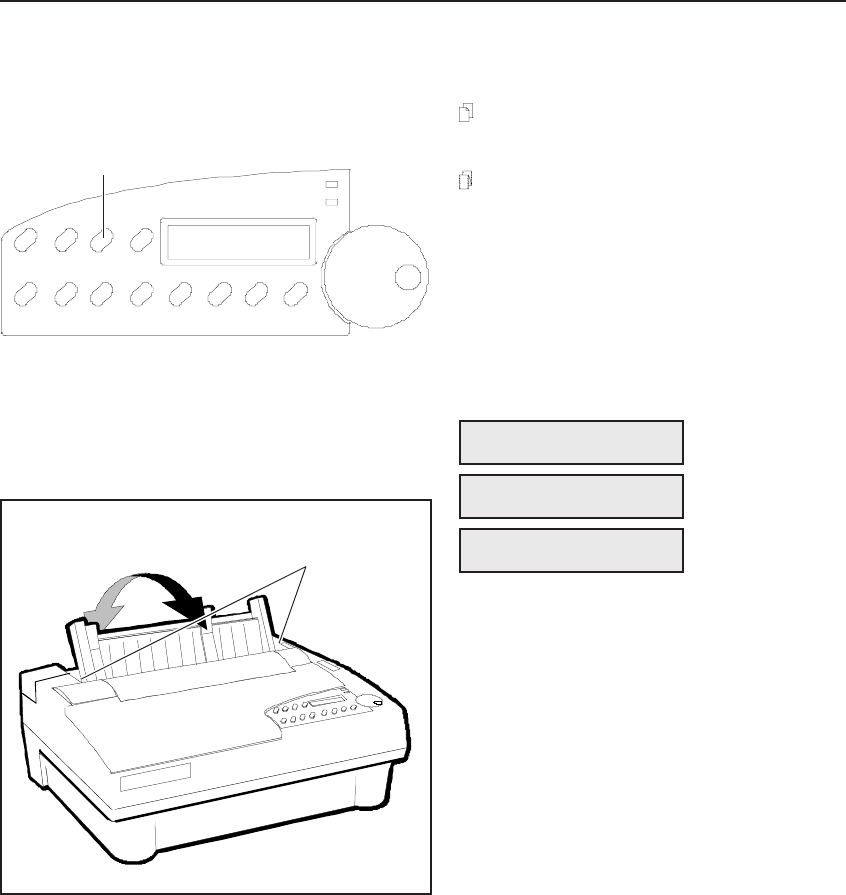
To select a paper path, press the Paper
Path button on the control panel (see figure
3-1) to cycle through the paper path
selections. The paper path that appears on
the control panel display indicates the active
path:
After you select a paper path, the tractor
select indicator will move to the correct
position automatically.
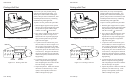
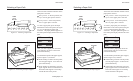
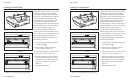
You should then position the paper support,
shown in figure 3-2, as follows:
99
99
9 When feeding cut sheets into the printer,
raise the paper support. It will lock into
place automatically.
99
99
9 When feeding pin-feed paper, lower the
paper support. Push in on the buttons on
both sides of the support so it will drop
toward the back of the printer.
Figure 3-2. Positioning the Paper Support
PATH: Top
PATH: Rear
PATH: Bottom
BUTTONS
PAPER
PATH
BUTTON
Figure 3-1. Selecting a Paper Path
PATH: Top
User's Guide
Loading Paper 3-3
Selecting a Paper Path
The tractor select indicator indicates which
paper path is selected:
Rear position: In the rear position, the
top or bottom paper path is selected.
Front position: In the front position,
the rear paper path is selected.
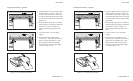
To select a paper path, press the Paper
Path button on the control panel (see figure
3-1) to cycle through the paper path
selections. The paper path that appears on
the control panel display indicates the active
path:
After you select a paper path, the tractor
select indicator will move to the correct
position automatically.
You should then position the paper support,
shown in figure 3-2, as follows:
99
99
9 When feeding cut sheets into the printer,
raise the paper support. It will lock into
place automatically.
99
99
9 When feeding pin-feed paper, lower the
paper support. Push in on the buttons on
both sides of the support so it will drop
toward the back of the printer.
Figure 3-2. Positioning the Paper Support
PATH: Top
PATH: Rear
PATH: Bottom
BUTTONS
PAPER
PATH
BUTTON
Figure 3-1. Selecting a Paper Path
PATH: Top