


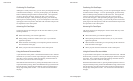
User's Guide
Loading Paper 3-7
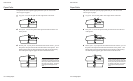
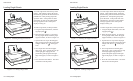
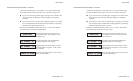
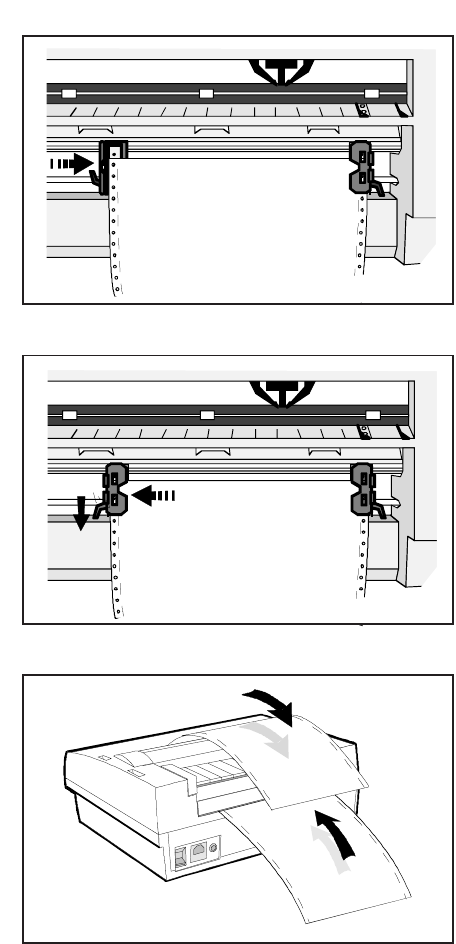
6. Mount the paper onto the first three pins
of both tractors, as shown in figure 3-8,
and close the tractor doors. You'll need
to slide the right-edge tractor left or right
as needed until its pin belt aligns with the
paper holes.
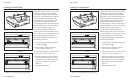
7. Slide the right-edge tractor as needed to
make the paper just slightly taut between
the tractors, as shown in figure 3-9.
Then, lock the right-edge tractor into
place.
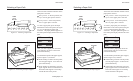
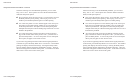
8. Lower the tractor cover and paper
support.
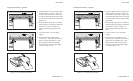
9. Press the Form Feed button on the
control panel. The printer advances the
paper to the first printable line. After
printing begins, make sure the paper
exits the printer over the paper support,
as shown in figure 3-10.
Loading Pin-Feed Paper––continued
Figure 3-8. Loading Paper Into the Tractors
Figure 3-10. Checking the Exit Path
Figure 3-9. Making Sure the Paper is Taut
User's Guide
Loading Paper 3-7
6. Mount the paper onto the first three pins
of both tractors, as shown in figure 3-8,
and close the tractor doors. You'll need
to slide the right-edge tractor left or right
as needed until its pin belt aligns with the
paper holes.
7. Slide the right-edge tractor as needed to
make the paper just slightly taut between
the tractors, as shown in figure 3-9.
Then, lock the right-edge tractor into
place.
8. Lower the tractor cover and paper
support.
9. Press the Form Feed button on the
control panel. The printer advances the
paper to the first printable line. After
printing begins, make sure the paper
exits the printer over the paper support,
as shown in figure 3-10.
Loading Pin-Feed Paper––continued
Figure 3-8. Loading Paper Into the Tractors
Figure 3-10. Checking the Exit Path
Figure 3-9. Making Sure the Paper is Taut