


FAXING WITH NETCENTRIC
™
FAXSTORM
17 - 8
About Sending a Fax as E-mail
You can send fax files and attachments to a recipient’s e-mail address
rather than to a fax number. When fax files are sent by
e-mail, they arrive as TIFF file attachments to the e-mail message. The
recipient can then view the TIFF files with an e-mail utility or an external
image viewing application. The e-mail message to which the TIFF files
are attached includes a URL to a web page that instructs the recipient how
to configure the e-mail application to view the TIFF file attachments.
Most of the steps for sending fax files to an e-mail address are the same as
for sending fax files to a fax number. The main difference is that you
choose E-mail from the Send As options. You must specify a valid e-mail
address for the recipient. Fax files that you have sent to an e-mail address
appear in Status Manager as job type E-mail.
If you are sending a fax to more than one recipient, choose E-mail from
the Send As options. The application sends the selected files to the e-mail
address of each person in the recipient list. If you have not provided an e-
mail address for a recipient, the fax job to that recipient is not sent.
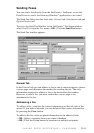
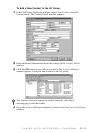
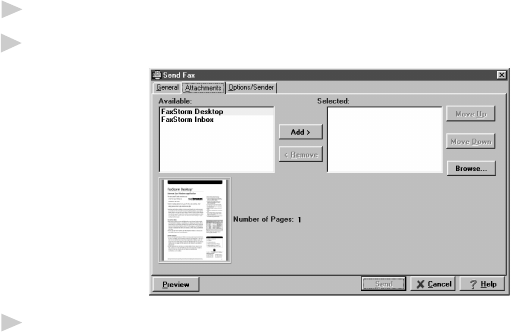
Attachments Tab
Use the Attachments tab to attach documents to your fax from your hard
drive or from your Attachments list. Attachments must be image files,
which you create from any Windows
®
application with the Print Driver.
Attachments can be files with the following extensions: TIFF, ASCII,
BMP, JPEG, GIF, PCX, ICON, PDF and PSD.
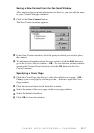
1
Select the Attachments tab from the Send Fax window.
2
The Attachments window appears, and displays the files that are available:
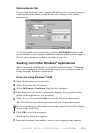
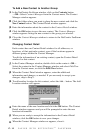
3
To place an Attachment in the selected window, click the name the
Attachment, then click the Add button—OR—To select an attachment
from your hard drive that is not in your Attachment List, click Browse to
locate the file.
Attachments added in the Send Fax window are for this fax only.