ASSEMBLY AND CONNECTIONS
2 - 10
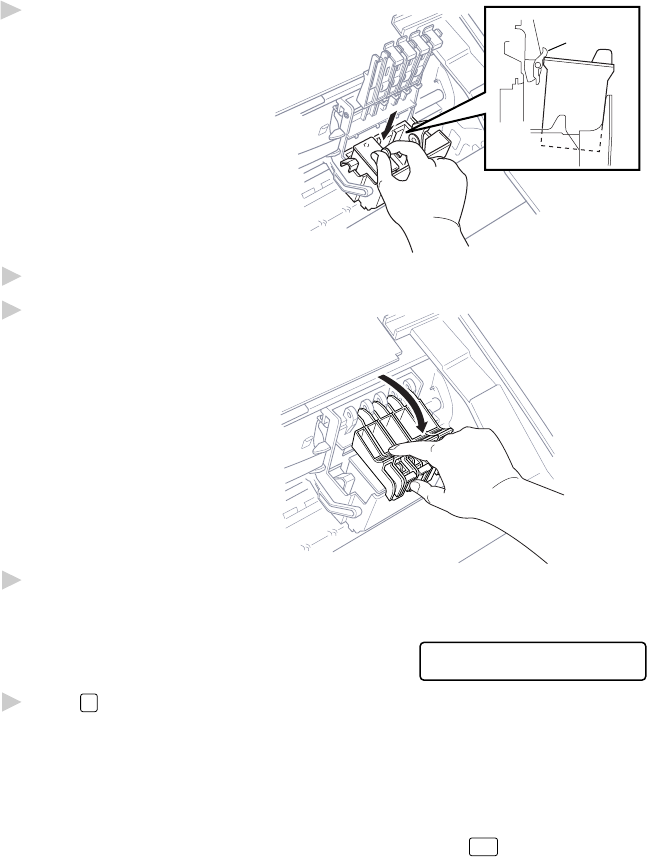
7
Each color has its own
Cartridge
Sensor
correct position.
Gently insert the
Black ink cartridge,
matching the color of the
cartridge covers. Please
be careful not to press
down on the cartridge
sensor (see illustration)
when inserting a cartridge.
8
Repeat Steps 5–7 to install each color ink cartridge.
9
Close the cartridge covers
until they click into place.
10
After installing all ink cartridges, close the
scanner cover. Your MFC now prepares for
a “head cleaning” and goes online so it can
set the ink dot counter. The MFC will ask
DID YOU CHANGE
BLCK?1.YES 2.NO
you if you changed each color ink cartridge.
11
Press
1
on the dial pad for each color, as prompted (for initial setup only)
within 1 minute. The MFC will enter a cleaning cycle for approximately 6
minutes. The screen alternately displays CLEANING BLACK and
PLEASE WAIT. The ink dot counter will be set automatically for each
color, so the MFC can warn you with an error message when ink is
running low.
Make sure paper is loaded in the cassette, then press
Start
within 1 minute.
When the MFC completes the cleaning cycle, the MFC starts printing the
test sheet.


