Chapter 8 Establishing Cisco Secure ACS System Configuration
RDBMS Synchronization
8-36
Cisco Secure ACS 3.0 for Windows 2000/NT Servers User Guide
78-13751-01, Version 3.0
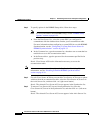
Step 3 To specify options in the RDBMS Setup table, follow these steps:
Note For more information about RDBMS setup, see the “RDBMS Setup
Options” section on page 8-34.
a. From the Data Source list, select the system DSN you configured to
communicate with the database that contains your accountActions table.
For more information about configuring a system DSN for use with RDBMS
Synchronization, see the “Configuring a System Data Source Name for
RDBMS Synchronization” section on page 8-32.
b. In the Username box, type the username for a database user account that has
read/write access to the accountActions table.
c. In the Password box, type the password for the username specified in the
previous step.
Result: Cisco Secure ACS has the information necessary to access the
accountActions table.
Note It is not necessary to select Manually under Replication Scheduling. For more
information, see the “Disabling Scheduled RDBMS Synchronizations”
section on page 8-39.
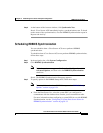
Step 4 For each Cisco Secure ACS that you want this Cisco Secure ACS server to update
with data from the accountActions table, select the Cisco Secure ACS server in
the AAA Servers list, and then click —> (right arrow button).
Result: The selected Cisco Secure ACS server appears in the Synchronize list.
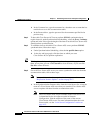
Step 5 To remove Cisco Secure ACS servers from Synchronize list, select the
Cisco Secure ACS server in the Synchronize list, and then click <— (left arrow
button).
Result: The selected Cisco Secure ACS server appears in the AAA Servers list.


