


Chapter 3 Windows Host Configuration
46
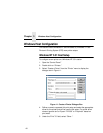
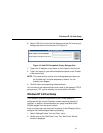
Windows 95 Host Setup
To configure a new printer on a Windows 95 station:
1. Select “Settings:Printers” from the “Start” menu.
2. Double click on the “Add Printer” icon.
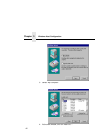
3. Select “Network Printer” from the second window of the “Add Printer”
wizard that loaded.
4. At the next window, click on BROWSE to help fill in the network path
of this printer.
5. At the “Browse for Printer” dialogue box that displays, double click on
the appropriate workgroup containing the PrintNet. By default, the
print server falls under the workgroup, “WORKGROUP.”
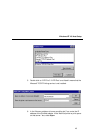
6. Continue searching the network until you see the PrintNet name,
“M_
xxxxxx
”, where “
xxxxxx
” equals the last six digits of the print
server Ethernet address found when a configuration is printed.
7. Once you see the PrintNet, double click on it to display a list of pre-
defined destinations/queues to choose from.
8. Select a destination/queue that will use “
d1prn.”
9. Click OK once you have selected a destination.
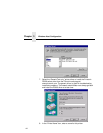
10. Back at the network path window, select NEXT since this path should
now be filled in for you.
11. At the next window, select the appropriate print driver and click on
NEXT.
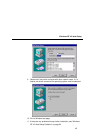
12. Fill in a name for this new network printer at the next window and
decide if you want this to be the default printer. This printer name can
be anything you would like as long as it is unique.
13. When prompted for a test page, select either “Yes” or “No” depending
on the state of the attached printer and click on FINISH.
NOTE: Windows may ask for a disk or CD-ROM to load the appropriate
printer driver to complete this new printer setup.
There should now be a new printer icon within the “Printers” folder. This
new network printer relies on NetBIOS over TCP/IP as the underlying
protocol to print to the PrintNet.