


3
Finish setting up your HP All-in-
One
After you have completed the steps in your Setup Guide, refer to this chapter to help
you finish setting up your HP All-in-One. This chapter describes how to set up your
language and country/region preferences, and it explains the different ways you can
connect your HP All-in-One.
In addition to the setup instructions in this User Guide, you can also set up HP Instant
Share on your network-connected HP All-in-One, so you can easily share images with
friends and relatives. If you installed the HP Image Zone software, press the
HP Instant Share button on the control panel of your network-connected HP All-in-
One to launch the setup wizard on a connected computer. For more information on
setting up HP Instant Share, see the 2570 series Help section in the onscreen
HP Image Zone Help.
● Change the device language and country/region. For more information, see Set
your language and country/region.
● Explore the connection options for your HP All-in-One, including USB, wired
networking, Bluetooth, and printer sharing. For more information, see Connection
information.
Set your language and country/region
The language and country/region setting determines which language the HP All-in-
One uses to display messages on the color graphics display. Usually, you set the
language and country/region when you first set up the HP All-in-One. However, you
can change the setting at any time by using the following procedure.
1. Press Setup.
2. Press
until Preferences is highlighted, press OK, then press OK again.
This displays the Preferences menu, and then selects Set Language & Country/
Region.
A list of languages appears. Press
or to scroll through the list of languages.
3. When your language is highlighted, press OK.
4. When prompted, press OK for Yes or press
until No is highlighted, then press
OK.
The countries/regions for the selected language appear. Press
or
to scroll
through the list.
5. When the country/region you want to select is highlighted, press OK.
6. When prompted, press OK for Yes, or press
until No is highlighted, then press
OK.
Connection information
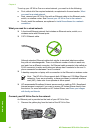
Your HP All-in-One comes equipped with a USB port so you can connect directly to a
computer using a USB cable. You can also connect your HP All-in-One to a wired
network. If you insert an HP bt300 or HP bt400 series Bluetooth
®
Wireless Printer
User Guide 23
Finish setup