


2Ć22 Installation and Configuration
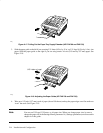
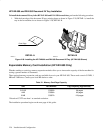
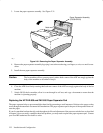
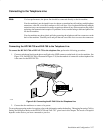
3. Locate the paper separator assembly. See Figure 2-31.
Figure 2Ć31. Removing the Paper Separator Assembly
750_11
Notch
Paper Separator Assembly
(C3530-62913)
4. Remove the paper separator assembly by prying it out at the notch using your fingers, a coin, or a small screw-
driver.
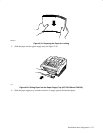
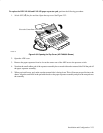
5. Install the new paper separator assembly.
Caution The fax machine will not operate properly unless both corners of the ADF are snugly against the
body of the machine as described in step 6.
6. Close the ADF door firmly ensuring that both rear corners of the ADF are snugly against the body of the fax
machine.
7. Switch ON (I) the fax machine, allow it to run through its self test, and copy a document to ensure that the
machine is operating properly.
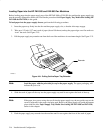
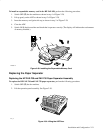
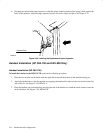
Replacing the HP FAX-900 and FAX-950 Paper Separator Pad
The paper separator helps to prevent multiple sheet feed by presenting a small amount of friction to the pages as they
move through the automatic document feed mechanism. The paper separator pad is the part of the separator that con-
tacts the pages.
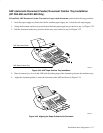
If your fax machine has been heavily used throughout its life and adjustment of the pressure switch alone as described
in chapter 5 does not rectify a multiple sheet feed problem, you may need to replace the paper separator pad. Contact
your local HP authorized fax dealer to order.