


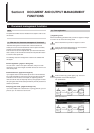

Section 6 DOCUMENT AND OUTPUT MANAGEMENT FUNCTIONS
6-7
3
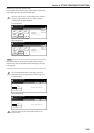
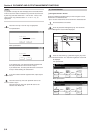
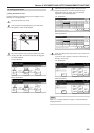
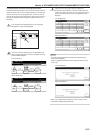
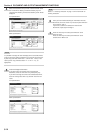
Select the documents that you want to check and then touch
the “Cont/Crrt. details” [“Check/Rev. details”] key.
The “Check/Correct details” [“Check/revice details”] screen
will be displayed.
Inch specifications
Box editing
Up
Delete
Close
Document Management - Shared Data Box
Down
Order of
indication
Cont/Crrt.
details
001/010
Job 005
Job 004
Job 003
Job 002
Job 001
1
1
1
1
1
25/10/01
25/10/01
25/10/01
25/10/01
25/10/01
Document data box
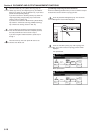
Metric specifications
Up
Delete
Close
Down
Box editing
Document Management - Shared Data Box
Order of
indication
1
1
1
001/003
Document data box
JOB003
JOB002
JOB001
Check/Rev.
details
25/10/01
25/10/01
25/10/01
NOTE
It is possible to change the order of display for the stored documents.
To do so, touch the “Order of indication” key, and then touch the “Sort
by date” key (and select either “New R Old” or “Old R New”) or the
“Sort by name” key (and select either “A R Z” or “Z R A”), as
appropriate.
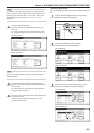
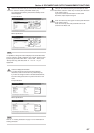
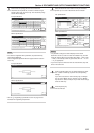
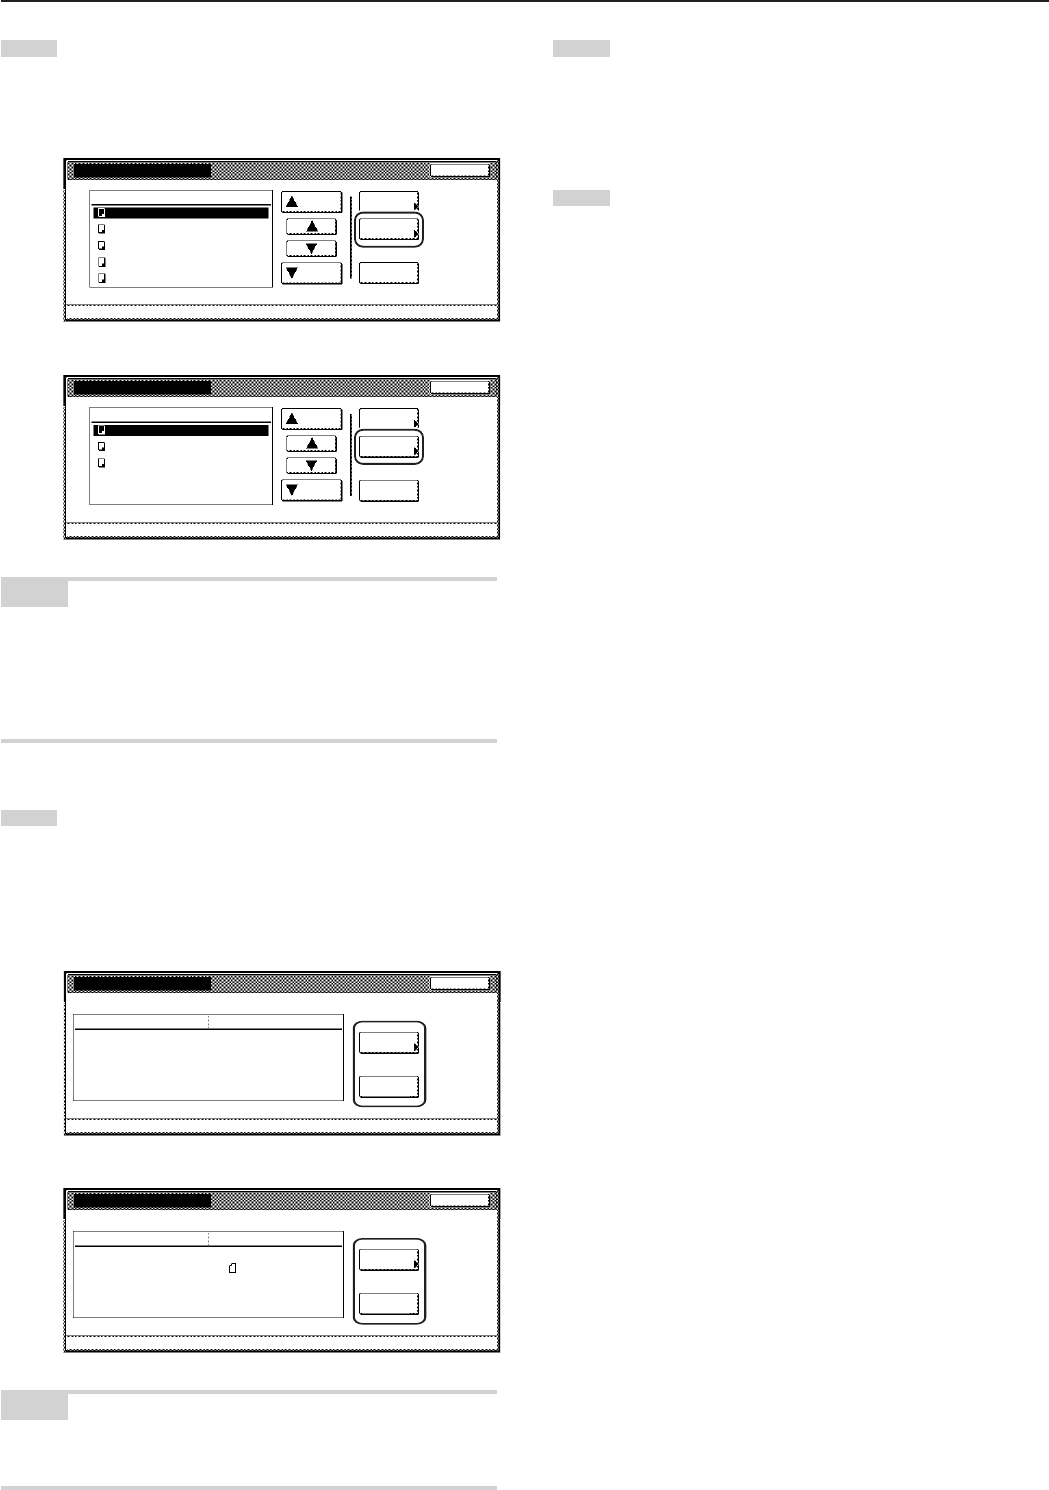
4
Check the displayed information.
If you want to print out the first page of the selected
documents, touch the “Print from 1st” [“Head Print”] key.
If you want to change the name of the selected documents,
touch the “Change doc.name” key and then enter the new
name.
Inch specifications
Check/Correct details
Item Details
Change
doc. name
Print
from 1st
Close
Document Management - Shared Data Box - Box editing
User name --------------------
Document name Job005
Registration size 11x15"
Orig. set direction Back Edge
page # 1
Input source Copy
Resolution 600dpi
Registration date '25/10/01 14:39
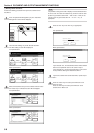
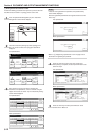
Metric specifications
Check/revise details
User name --------------------
Document name Job006
Registration size A4
Orig. set direction Back Edge
page # 1
Input source Copy
Resolution 600dpi
Registration date '25/10/01 14:39
Change
doc. name
Head
print
Close
Document Management - Shared Data Box - Box editing
Item Details
NOTE
Refer to “11. Entering characters” on page 7-104 for information on
entering characters.
5
Once you have finished checking the information for those
documents, touch the “Close” key. The touch panel will return
to the screen in step 3.
If you want to check the information for other stored
documents, repeat steps 3 through 5.
6
Touch the “Close” key once again. The touch panel will return
to the screen in step 2.
Touch the “End” key. The touch panel will return to the
contents of the “Basic” tab.