


WORKABOUT PRO Hand-Held Computer With Windows CE 5.0 User Manual 113
Chapter 5: Configuration
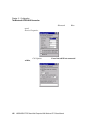
The Devices Tab
Note: The CH column shows the RFCOMM channel of the service if the
service is RFCOMM-based. This information is not generally needed
except for debugging purposes.
To add a service to the Outgoing port , an ac ti ve se rvi ce must fi rst be deact iva ted.
Then you can choo se the ‘Outgoing’ option fr om the Ac tiv ati on menu ( highlight a
service, r igh t-c li ck or pre ss t he [SPACE] bar to display the Activa ti on menu).
The Authentication and Encryption opt io ns can be changed only b efor e ac ti vation.
To change thes e after act ivation, d eactivate t he service fi rst, then chang e the options.
Once a servi ce is activ ate d, all the informat ion regarding t he se rvi ce, i ncluding the
RFCOMM channel numb er, is saved in the r egi st ry. (Some remot e devi ces may
change thei r RFCOMM cha nnel numb ers when they reboot , so you r sa ved se tt ing
may not wo rk when th e remote device i s reboot ed. In t hat ca se, you must deacti vate
the servi ce and react ivat e i t t o det ect the current RFCOMM c hannel . )
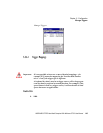
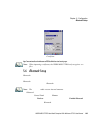
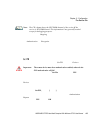
Set PIN
PINs ca n be set for each d evice by pressing the Set PIN button in the Devices tab, or
you can s kip t his step and try to c onnect to the d evice firs t.
Important: The remote device must have authentication enabled, otherwise the
PIN authentication will fail.
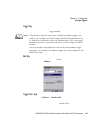
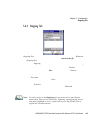
• Highli ght a devi ce, c li ck on t he Set Pin
but ton , and t ype t he PIN.
You will receive a mess age, e it her t hat the PIN has been succ essf ull y val id ate d or
that it has be en r ejected.
If the PIN ha s bee n val ida ted, a n ast er isk (*) appea rs in t he PIN column in the
Devices l is t b ox, i ndi cat ing tha t thi s d evice has a PI N se t. Once a P IN is e ntere d , it is
save d in the r egist ry.
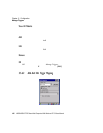
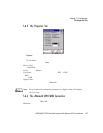
To remove the PIN:
• Choose Set PIN
, and press [ENTER].
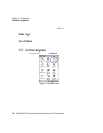
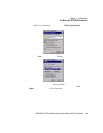
If the WORKABOUT PRO attempts to connect to a remote device that has
Authentication enabled and does not have a required PIN set, an Authentication
Request dialog box appears.
• Enter the PIN, and t ap on OK to c onnec t th e devi ces.