


WORKABOUT PRO Hand-Held Computer With Windows CE 5.0 User Manual 229
Chapter 6: Peripheral Devices & Accessories
Wiring Guidelines
To accommodate the servi ce loop of the connector cable, leav e a 4" clear ance at the
bottom of the cra dle . Leave a 7" (minimu m) cle ara nce at the to p of t he c radl e t o
allow easy r emoval of the h and-held . Also remember to le ave at least a 3" clear ance
at the si des of the cr adle to allow acti vat ion of the rele ase kn obs. Ref er to the
detaile d ass embly i n st ruct io ns that are p ackag ed wit h the cradle wh en se lec ti ng a
mounting loca tion.
6.11.1.1 Mounting Template
The vehicle cradle is shipped with detailed mounting instructions including a drill template.
6.11.2 Wiring Guidelines
Before installing cables bet ween t he cradle and ot her devi ces , review the fo llo wi ng:
• Ensure that dri ll ing holes will not damage the vehicle or i ts wiring.
• Prote ct c able runs fr om p inch ing, o verhe ati ng a nd phys ical damage.
• Use grommets to p rot ect cabl es t hat pass through metal.
• Use plas ti c st rap s and t ie -downs to s ecur e cables and c onnect or s in t hei r
desired l ocat ion , away f rom ar eas whe re t hey may g et s nagged or pull ed.
• Keep cabl es a way fr om heat sour ces, grease, b att ery aci d and ot her
potentia l haz ard s.
• Keep cabl es a way fr om cont rol peda ls and other movi ng par ts tha t may
damage th e cab les or inte rfe re wi th t he ope ration of th e ve hicl e.
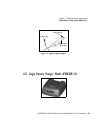
6.11.3 Using The Vehicle Cradle
If your WORKABOUT PRO is equi pped wi th a shoul der str ap or cove r, these
accessori es need to be removed before installing the unit in a vehicle cr adle. There is
no need to re mo ve hand str aps , pist ol grips or tethered device s fr om the unit .
• Slide the WORKABOUT PRO into the cra dle, a nd pr ess fir mly downwar d
until it loc ks i nto place. On a ve hicl e, i t’s a good idea to pull up on the
WORKABOUT PRO to be certain that it is secure.
• To remove the unit , pre ss f ir mly on t he RELEASE butt on on the fron t fa ce
of the unit unt il it rel eases from it la tch. The hand-hel d wil l be sli ght ly
raised so that it can be removed.