


Chapter 2: Installation and Configuration
24
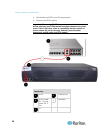
B. Network Port
The KSX II provides two Ethernet ports for failover purposes (not for
load-balancing). By default, only LAN1 is active and the automatic
failover is disabled. When enabled, if the KSX II internal network
interface or the network switch to which it is connected becomes
unavailable, LAN2 will be enabled using the same IP address.
Note: Because a failover port is not activated until after a failover has
actually occurred, Raritan recommends that you either not monitor the
failover port or monitor it only after a failover occurs.
To connect the network:
1. Connect a standard Ethernet cable (included) from the network port
labeled LAN1 to an Ethernet switch, hub, or router.
2. To make use of the optional KSX II Ethernet failover capabilities:
Connect a standard Ethernet cable from the network port labeled
LAN2 to an Ethernet switch, hub, or router.
Enable Automatic Failover on the Network Configuration page.
Note: Use both network ports only if you want to use one as a failover
port.
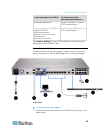
C. Local User Port (Local Video, Display and Keyboard) and Local Admin
Port
For convenient access to KVM target servers and serial devices while at
the rack, use the KSX II Local Access port. While the local port is
required for installation and setup, it is optional for subsequent use. The
local port provides the KSX II Local Console graphical user interface for
administration and target server access.
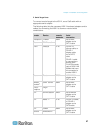
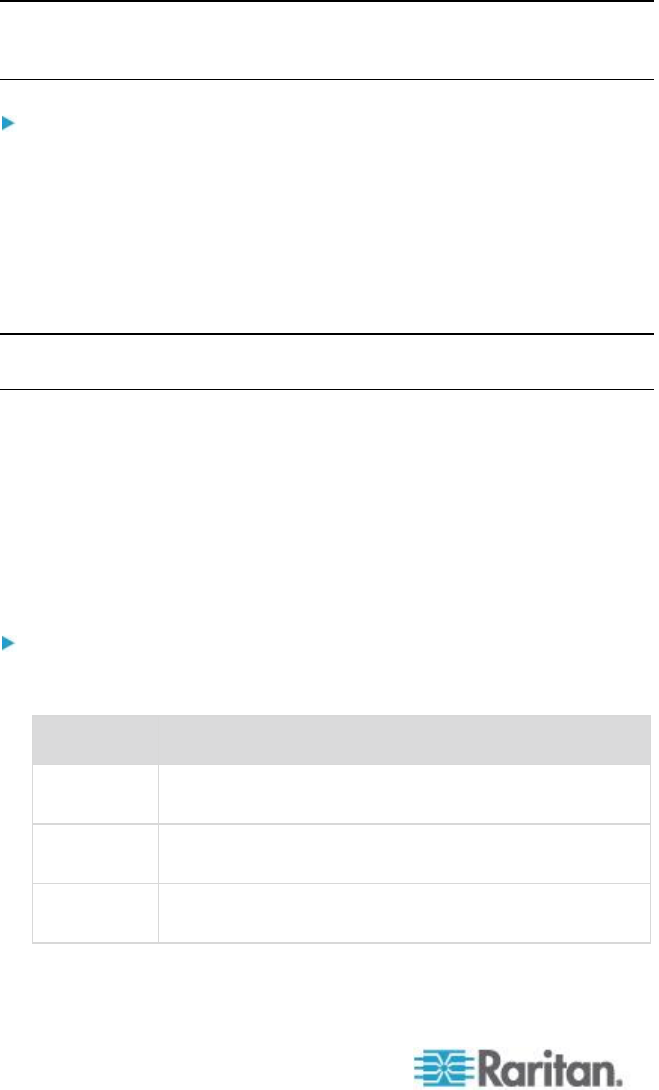
To connect the Local User port:
Attach a multi-sync VGA monitor, keyboard, and mouse to the
respective Local User ports using a USB keyboard and mouse.
Connection
Description
Monitor
Attach a standard multi-sync VGA monitor to the
HD15 (female) video port.
Keyboard
Attach a standard USB keyboard to one of the USB
Type A (female) ports.
Mouse
Attach a standard USB mouse to one of the USB
Type A (female) ports.