ADJUSTABLE TRAY
Using the control panel to identify the paper size of an adjustable tray
The image sent to the printer is placed on the page according to
the size of the paper being fed.
You can identify the adjustable tray as a type A Tray or a type B
Tray. (Refer to step 7 in “Loading paper in the adjustable tray.”)
Once identified, use the control panel to select the paper size of
the identified tray. The printer can then place the image in the
correct location on the paper.
Before submitting your print job, use the following buttons on
the control panel to access the Main Menu and to specify the
page size or sizes for your adjustable tray.
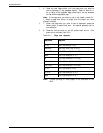
H 1. Press the Online button to take the printer off line. (The
green online indicator light is not lit.)
A 2. Press the Menu button to access the Main Menu. The
display reads:
MAIN MENU
PRINTER LANGUAGE
C 3. Press the Last Page button until the display reads:
MAIN MENU
ADJ PAPER SIZE
B 4. Press the Test button to display the adjusted paper size
headings. The display reads:
ADJ PAPER SIZE
ADJUSTABLE A
C Note: If you wish to use an adjustable tray which is identified as
type B Tray, press the Last Page button to display ADJUSTABLE B.
B 5. Press the Test button to display the lower level adjustable
tray page size options. The display reads the current size
selected, such as:
ADJUSTABLE A
8 X 10
or
ADJUSTABLE B
8 X 10
XEROX 4213 LASER PRINTER USER GUIDE A1-7


