


XEROX COAX/TWINAX OPTION
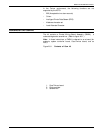
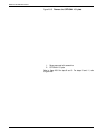
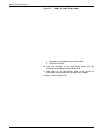
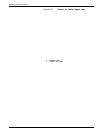
Figure A3-7. Install the Coax/Twinax board
1. Connector on the system controller board at J6
2. Coax/Twinax board
10. Align the connector of the Coax/Twinax board with the
connector on the system controller board at J6.
11. Press down on the Coax/Twinax board at the corners on
either side of the connector until the board is fully seated.
For step 12, refer to figure A3-8.
A3-12 XEROX 4213 LASER PRINTER USER GUIDE