


Replacing a Switch and Reusing its Configuration 343
How Switch
Replacement Works
1 A network administrator enables the Auto-Config IP Subnet Matching
option in 3WXM. (This option is on the 3WXM Services Setup dialog.)
2 Someone at the remote office physically unplugs the failed switch and
plugs in a new, unconfigured switch or a pre-staged switch.
3 The person at the remote office powers on the new switch.
If the switch is a WXR100, the person at the remote office also inserts a
paperclip or similar object into the WXR100’s Fn hole to press the Fn
switch. Normally, the Fn LED (the right LED above port 1) remains solidly
lit for 3 seconds after power on. However, when the Fn switch is pressed,
the LED flashes for 3 seconds instead.
4 The new switch requests a configuration from 3WXM, using the process
described in “Drop Ship (WXR100 Only)” on page 332 or “Staged WX”
on page 334. (The process depends on whether the switch is a WXR100
or is any model that has been prestaged.)
5 3WXM finds a switch configuration that matches the model and MSS
version and has a management interface in the same subnet as the new
switch.
3WXM also notices that the serial number of the new switch does not
match the serial number in the switch configuration in 3WXM. However,
because the Auto-Config IP Subnet Matching option is enabled, 3WXM
does not reject the configuration request.
Enabling
Replacement of
Remote Switches
This configuration task is performed by the network administrator using
3WXM.
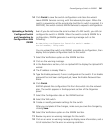
To enable replacement of remote switches
1 Open the network plan that contains the remote switches you want to
allow to be replaced.
2 Select Tools > 3WXM Services Setup from the toolbar in the main
3WXM window.
3 On the Service Settings tab, select Auto-Config IP Subnet Matching.
4 Click Save.