


Chapter 7 I/O Unit (IOU) Replacement 7-21
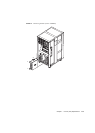
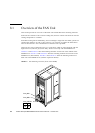
8. Remove the IOU to be replaced. (See FIGURE 7-7 - FIGURE 7-9)
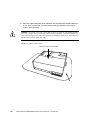
a. Using a Phillips screwdriver, turn the knob screws securing the upper and lower
eject/lock levers 90 to 180 degrees to unlock the levers. (Turn the knob screw
while lightly pulling the lever by one hand.)
b. Unlock the eject/lock levers to pull the IOU off the backplane.
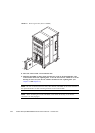
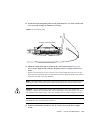
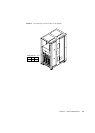
c. While grasping the handle at the front of the IOU, pull the IOU out partially until
the [NEAR TO END] label comes into view.
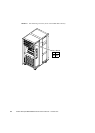
d. Raise the handle at the upper part of the IOU.
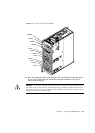
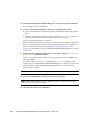
e. While grasping the front and upper handles of the IOU, pull it out slowly from
the slot.
Note – To upgrade the IOU, remove the dummy (filler) unit before mounting the IOU to be
added. Since the same levers are used on the dummy (filler) unit, please operate the
eject/lock levers in the same manner.
Caution – An IOU with mounted components in the maximum configuration weighs about
21 kg.
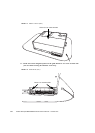
9. Place the removed IOU on an antistatic mat.
10. Dismount the HDD (or filler panel) and the PCI cards on the detached IOU, and
remount them all on the replacing IOU. As for the PCI cassette, which serves as the
housing for PCI card, use the one which is mounted on the replacing IOU. (See
Chapter 12 and Chapter 13)
Note – Be sure to remount the PCI cards, filler boards, and HDDs in the same locations in
the replacement IOU as their mounting locations in the removed IOU.
Note – When mounting PCI cards and HDDs, fully insert them so that the connectors are
completely engaged.