Using the ScanSnap in Various Ways (for Windows users)
155
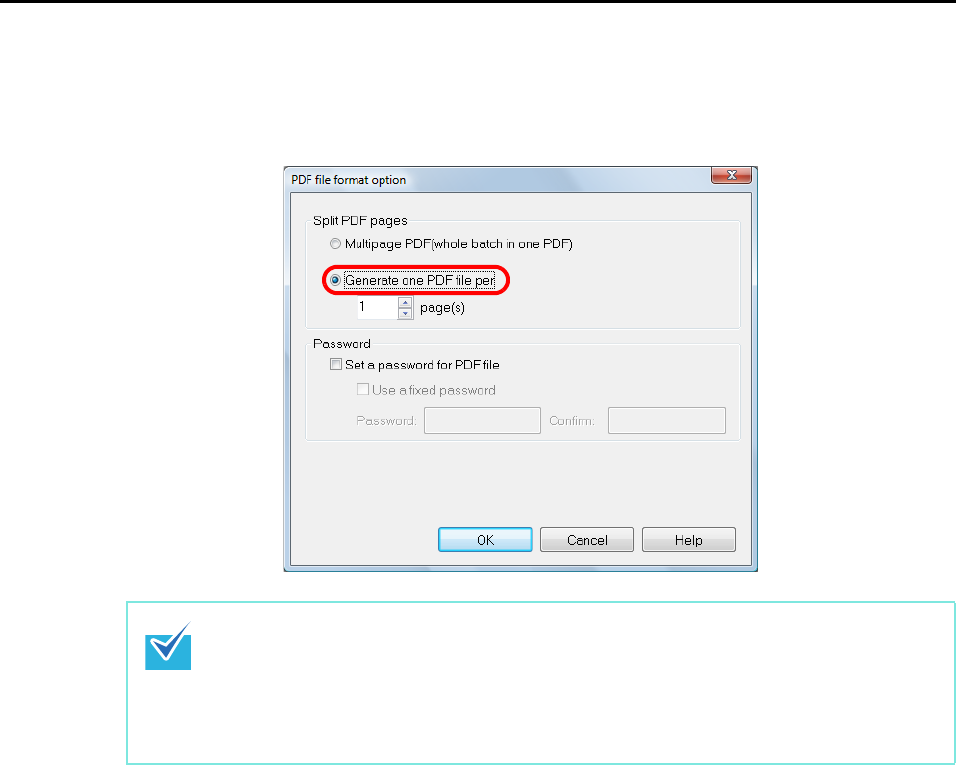
3. Select [Generate one PDF file per (n) page(s)] and enter a number.
One PDF file is created every time the number of pages specified here has been
scanned.
4. Click the [OK] button to close all open dialog boxes.
5. Load the document in the ScanSnap.
For details, refer to "Paper Sizes of Documents" (page 26) and "How to Load
Documents" (page 28).
6. Press the [Scan] button on the ScanSnap.
D One PDF file is created every time the number of pages specified in Step 3. has
been scanned.
In Duplex mode, two pages (front/back) are created per document sheet.
When you select the [Allow automatic blank page removal] check box in the [Read mode
option] dialog box displayed by clicking the [Scanning] tab J [Option] button, blank pages
are removed from documents with blank pages so the number of pages of the original
documents and the scanned image data does not match. Clear this check box when you
want to keep the original page number order.
