10-10
(4) To prevent static discharges, remove all static electricity from your body.
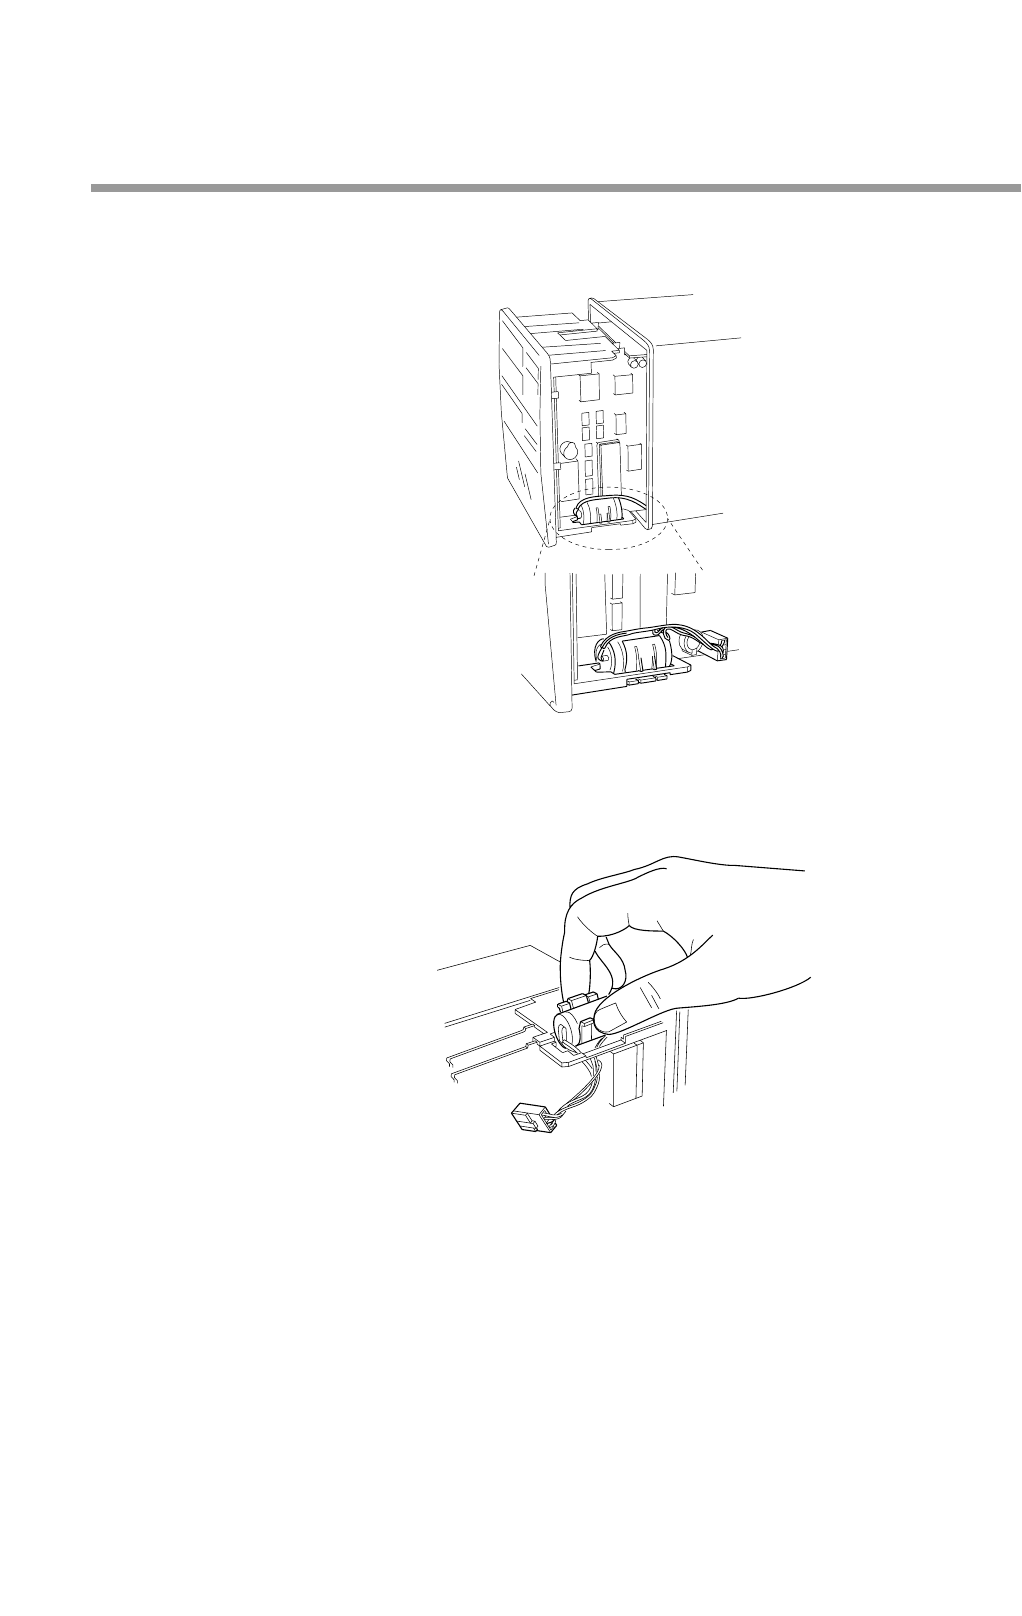
(5) Slide the controller completely out of the case.
>>
The battery is located on the right side as seen from the front of the controller.
(6) Place the controller on a desk upside-down so that the battery is easily
accessible.
(7) Disconnect the connectors.
(8) Open the tab on the black clip that secures the battery and lift out the battery.
(9) Remove the old battery from the clip.
(10)Insert the new battery in the clip.
(11)Orient the positive pole of the battery forwards and press the clip with the
battery into the square opening.
(12)Insert the connectors in the printed circuit board.
(13)Slide the controller back into the case.
(14)Open the key cover and firmly tighten the lock screw under the ENTER key
using a Phillips screwdriver.
(15)
When all procedures have been completed, affix a label giving the date when
the battery should be replaced next time in an easy to see location on the
controller.
(16)Turn on the power to make sure that the BAT LED does not go on.
Chapter 10. TROUBLESHOOTING


