


Installing the BayStack 350 Switch
309979-A Rev 00
2-7
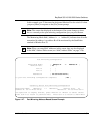
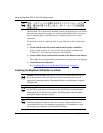
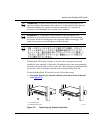
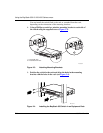
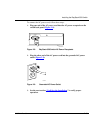
4.
Insert two screws, appropriate for your 19-inch rack, into each of the
mounting brackets and tighten.
5.
After the switch is secured in the rack, see the next section, “Attaching
Devices to the BayStack 350 Switch.”
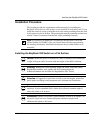
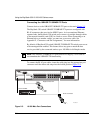
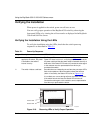
Attaching Devices to the BayStack 350 Switch
This section describes how to attach devices to the BayStack 350 switch ports and
how to connect a console terminal to the switch Console/Comm port. You can use
the console terminal to observe the power on self-test results and setup the switch,
if required, as described later in this chapter.
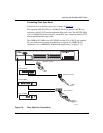
The BayStack 350 switch has an Uplink/Expansion slot that allows you to attach
optional media dependent adapters (MDAs). The MDAs support a range of media
types (see Appendix C, “Media Dependent Adapters” for more information about
MDA types available from Nortel Networks). Refer to the documentation that
came with your specific MDA for information about its cabling and LED
indications.
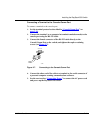
Depending on your network configuration requirements, connect the RJ-45 port
cables, the console port, and any optional MDA port cables. After attaching the
devices to the BayStack 350 switch, see “
Connecting Power” on page 2-12 to
connect the AC power cord and power up the switch.
You can connect the BayStack 350 switch to any equipment that conforms to the
IEEE 802.3 standard, such as the following devices:
• Ethernet networking devices
• Individual workstations or servers
• Other switches, bridges, or hubs