


Using the BayStack 350 10/100/1000 Series Switch
2-4
309979-A Rev 00
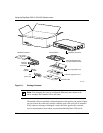
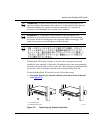
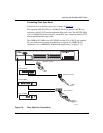
The BayStack 350 switch can be mounted onto any appropriate flat, level surface
that can safely support the weight of a switch and its attached cables, as long as
there is adequate space around the unit for ventilation and access to cable
connectors.
To install the switch on a tabletop, shelf, or any other flat surface, follow these
steps:
1.
Set the switch on the flat surface and check for proper ventilation.
Allow at least 2 inches (5.1 cm) on each side for proper ventilation and
5 inches (12.7 cm) at the back for power cord clearance.
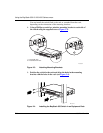
2.
Attach rubber feet to each marked location on the bottom of the chassis.
The rubber feet are optional but recommended to keep the unit from slipping.
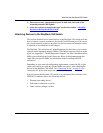
3.
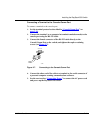
Attach all devices to the ports.
See “Attaching Devices to the BayStack 350 Switch
” on page 2-7.
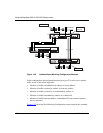
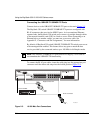
Installing the BayStack 350 Switch in a Rack
Caution:
When mounting this device in a rack, do not stack units directly on
top of one another in the rack. Each unit must be secured to the rack with
appropriate mounting brackets. Mounting brackets are not designed to support
multiple units.
Achtung:
Wenn Sie dieses Gerät in einem Gerätegestell installieren, stellen
Sie die Geräte nicht direkt aufeinander. Jedes Gerät muß mit entsprechenden
Halterungen im Gestell befestigt werden. Die Halterungen sind nicht dafür
konzipiert, mehrere Geräte zu tragen.
Attention:
Si cet appareil doit être encastré dans un rack, ne jamais empiler
directement plusieurs unités les unes sur les autres. Chaque unité doit être
correctement fixée avec les membrures appropriées. Les membrures ne sont
pas conçues pour supporter le poids d'unités multiples.