


7 • INVIEW™ Accounting
7-14 SV62207 Rev. B
Creating an
Account
Follow the steps below to create an account:
1. Press the Account
s key.
2. Press the right arrow key to enter the Set Up Accounts screen.
3. Select Create Ac
count.
4. Select Create
a New Account. The system prompts you to enter an
account name.
5. Type in the name using the keyboard or numeric keypad and press
Enter. Th
e Account Information screen appears.
6. Select the appropriate option and follow the prompts.
• Name:
Select this option to edit the name of an account.
• S
peed Code: A speed code is a number that uniquely identifies an
account. You can use it as a short cut to identify accounts with long
names. As soon as you enter the name of your account, the system
automatically assigns a speed code to your account. Select this
option to change the speed code number assigned by the system.
• Pass
word: The account password is a four digit number that you
can assign to limit access to an account. As soon as you enter the
name of your account, the system will request that you enter the
account password if it is enabled. Select this option to assign,
change or disable the password if necessary. When you are running
mail, passwords must be globally enabled.
• Create Anoth
er Account: Select this option to add another
account, subaccount or subsubaccount to the system.
• Add Suba
ccount to: Select this option to add a subaccount to
your new account.
• Descripti
on: This option allows you to type in a brief description of
the account.
7. When you are done, press the right arrow key to save your account
in
formation. If you press the Clear key or the left arrow key during this
process the system will ask you if you want to save your changes.
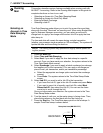
Creating an
Subaccount or
Subsubaccount
Any data charged to the existing account will be transferred to the subac-
count or subsubaccount you create.
1. Press the Account
s key.
2. Press the right arrow key to enter the Set Up Accounts screen.
3. Select Create
Account or SubAccount.
4. Select Add to
an Existing Account to enter the Select Account
screen. The system displays a list of all the existing accounts.
5. Select the appropriate account or subaccount. If necessary, press the
down
arrow to scroll through the list.
6. Type in the name of the new subaccount or subsubaccount and press
Enter. Th
e Account Information screen appears.
7. Select the appropriate option and follow the prompts.
8. When you are done, press Enter to save t
he account information.
9. Press the left arrow key to exit set up.
NOTE: If this is the first account on the system, skip to step 3.
NOTE: Wh
en naming your accounts, the total number of characters you
can use for the name is 74. This means that if you intend to add sub and
subsub accounts to this top level account name, the sum of the characters
for all three accounts levels cannot be greater than 74.