


DM925™ Digital Mailing System Operating Guide
SV62207 Rev. B 4-29
9. Repeat steps 1-8 as necessary.
10. Transfer Files:
a. Connect the control center to the Pitney Bowes Data Center.
b. Upload your records no later than the end of every day. To do this,
pre
ss Menu and select Confirmation Services.
11. The display automatically prompts you to print receipts or reports after
you upload re
cords, provided this feature is enabled in the customer
setting menu (the default for this option is enabled).
Use the Report
s key to select and print receipts and, optionally, a
report of all tracking information processed through the control panel.
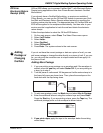
Processing Electronic Return Receipt with a Customer Reference
Number
The Pitney Bowes solution for Electronic Return Receipt (ERR) may
include the option to
use a Reference Number that can tie the USPS Track-
ing Number to an internal tracking number your organization assigns to a
clien
t or matter. By using this Reference Number, you’ll be able to look up
tracking numbers on the Internet, and relate that piece of mail to a specific
client.
Pitney Bowes provides a Reference Label Applicat
ion to support you with
processing mail using the Reference Number. This includes the ability to
print a barcode label (in the standard 3 of 9 format) that can be applied to
the mail piece for customer reference tracking for Electronic Return
Receipt. The label includes the 5-digit destination ZIP Code required by the
USPS, which eliminates the steps required to enter this information manu-
ally into the DM Series™ mailing system. The Ref
erence Number can be
up to 14 alphanumeric characters in length.
This information can be easily scanned into the mailing machine during
mail
processing, saving valuable time in entering the data manually. Also,
you can access delivery information from www.pb.com at “My Account.”
Using this site, you can search records using your unique customer refer-
ence number or the USPS tracking number from the Green Label.
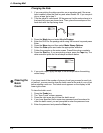
1. Weigh the envelope/package. Place the mail piece on the attached
scale or pro
cess using the mailing machine in the W-O-W® mode.
2. Select the class of mail, for example, F
irst Class or Priority Mail.
3. Select services:
a. Select E-Certified as th
e service for mail.
b. Select E-Ret Receipt.
c. Press Enter.
4. Enter the destination ZIP Code:
a. Scan or manually type the 5-d
igit destination ZIP Code.
b. Press Enter. (T
his step is not required if the system is set to auto-
enter.)