


7 • INVIEW™ Accounting
7-16 SV62207 Rev. B
Running
Mail
This section describes unique features available when running mail with
INVIEW™ Accounting. Refer to the Running Mail chapter in this guide for
complete directions on how to run mail.
• Selecting an Account in Time Date Stamping Mode
• Selecting an Account in Seal Only Mode
• Entering a Batch Surcharge
• Selecting a Job ID
Selecting an
Account in Time
Date Stamping
Mode
Time Date Stamping mode allows you to print the current time and date,
along with the word “Received” on incoming mail. When using Budget Man-
ager or Business Manager accounting, you can select an account to
charge b
ack to, apply a surcharge and/or select Job ID to apply the time
date stamp to.
The time and date will remain the same during a single transaction
(wheth
er you process a single envelope or 100 envelopes.) The system will
update the date and time during the mail run.
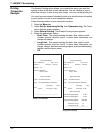
1. Press the Mode key
.
2. Select T
ime and Date Stamping.
3. Select Acct if you want t
o apply the time date stamp to a specific
account. Once you have made your selection, the system returns to the
Time Date Stamp Mode screen.
4. Select Surcha
rge if you want to apply a batch surcharge (a surcharge
that applies only to this transaction). You can apply a surcharge per
piece of mail, per transaction, and/or per transaction percentage.
a. Select the appropriate surcharge option and enter the surcharge
amount.
b. Press Enter. Th
e system returns to the Time Date Stamp Mode
screen.
5. Select J
ob ID if you want to add a Job ID to the transaction.
• If you know the Job ID, type in the Job ID number and press Enter.
• If you want to see a list of recently used Job IDs,
select Most
Recent Job ID, then select the Job ID. (You can use the down
arrow key to scroll through the list.)
Once you have made your selection, the system returns to the Time
Date S
tamp Mode screen.
6. Turn the piece of mail over, so the meter stamp is facing down. Then,
place
the envelope on the feed deck with the flap facing up.
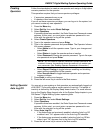
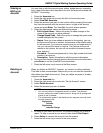
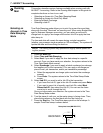
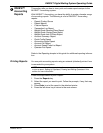
7. Press the St
art key. The Time/Date stamp prints on the envelope. A
sample Time/Date stamp is shown below.
4
NOTE: The mailing system may operate at a slightly slower speed dur-
ing this process.
Date prints here (MM DD YYYY)
Time prints here