


7 • INVIEW™ Accounting
7-18 SV62207 Rev. B
Selecting a Job
ID
The Job ID field allows you to identify specific tasks within an account.
Assigning a Job ID to a transaction allows you to track the amount of
money you spend on postage, as well as how frequently you process a
given transaction.
Follow the steps below to add a Job ID to a transaction:
1. From the Main screen, press the down arrow key.
2. Select J
ob ID. The Job ID screen appears.
• If you know the Job ID, type in the Job ID number and press Enter.
• If you want to see a list of recently used Job IDs,
select Most
Recent Job ID, then select the Job ID. (You can use the down
arrow key to scroll through the list.)
3. The system returns to the Main scree
n once you have made your Job
ID selection.
Transaction
Options
This section tells you how to create manual transactions and view transac-
tional data using INVIEW™ Accounting.
• Entering Manual Transaction
• Viewing the Transaction Log
• Transferring Transaction Data
• Clearing the Transaction Log
• Setting the Condition for the Log Full Warning
• Defining the Action to Take When the Log is Full
• Printing Transaction Receipts
Entering Manual
Transaction
Follow the steps below to create a manual transaction.
1. Press the Men
u key.
2. Select Manual
Transaction. The Manual Transaction screen appears.
The options you choose to use will vary depending upon your manual
transaction needs.
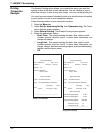
3. Select Acc
ount to choose an account from the available accounts on
your system to run the manual transaction against. Use one of the fol-
lowing methods to select an account:
• Manually scroll through the account list, then press the screen key
tha
t corresponds with the account name; or
• Press the left arrow key to toggle the speed code search, type in the
speed code,
and press Enter; or
• Press the left arrow key to toggle the account name search, type in
the
account name, and press Enter.
4. Select Class to set the
postage class. Follow the prompts to select the
appropriate carrier, class and special service options.
5. Select Actua
l Postage to set the actual postage amount for a piece of
mail. Type in the actual postage amount for a piece of mail and press
Enter.
6. Select Charge
d Amount to set the postage amount that you will be
charging for each piece of mail. (This is the actual postage amount plus
any surcharges you may want to add.) Type in the charged postage
amount for a piece of mail and press Enter.
7. Select Piec
e Count to set the number of pieces of mail you want to
process. Type in the number of pieces you want to mail and press
Enter.
4