25
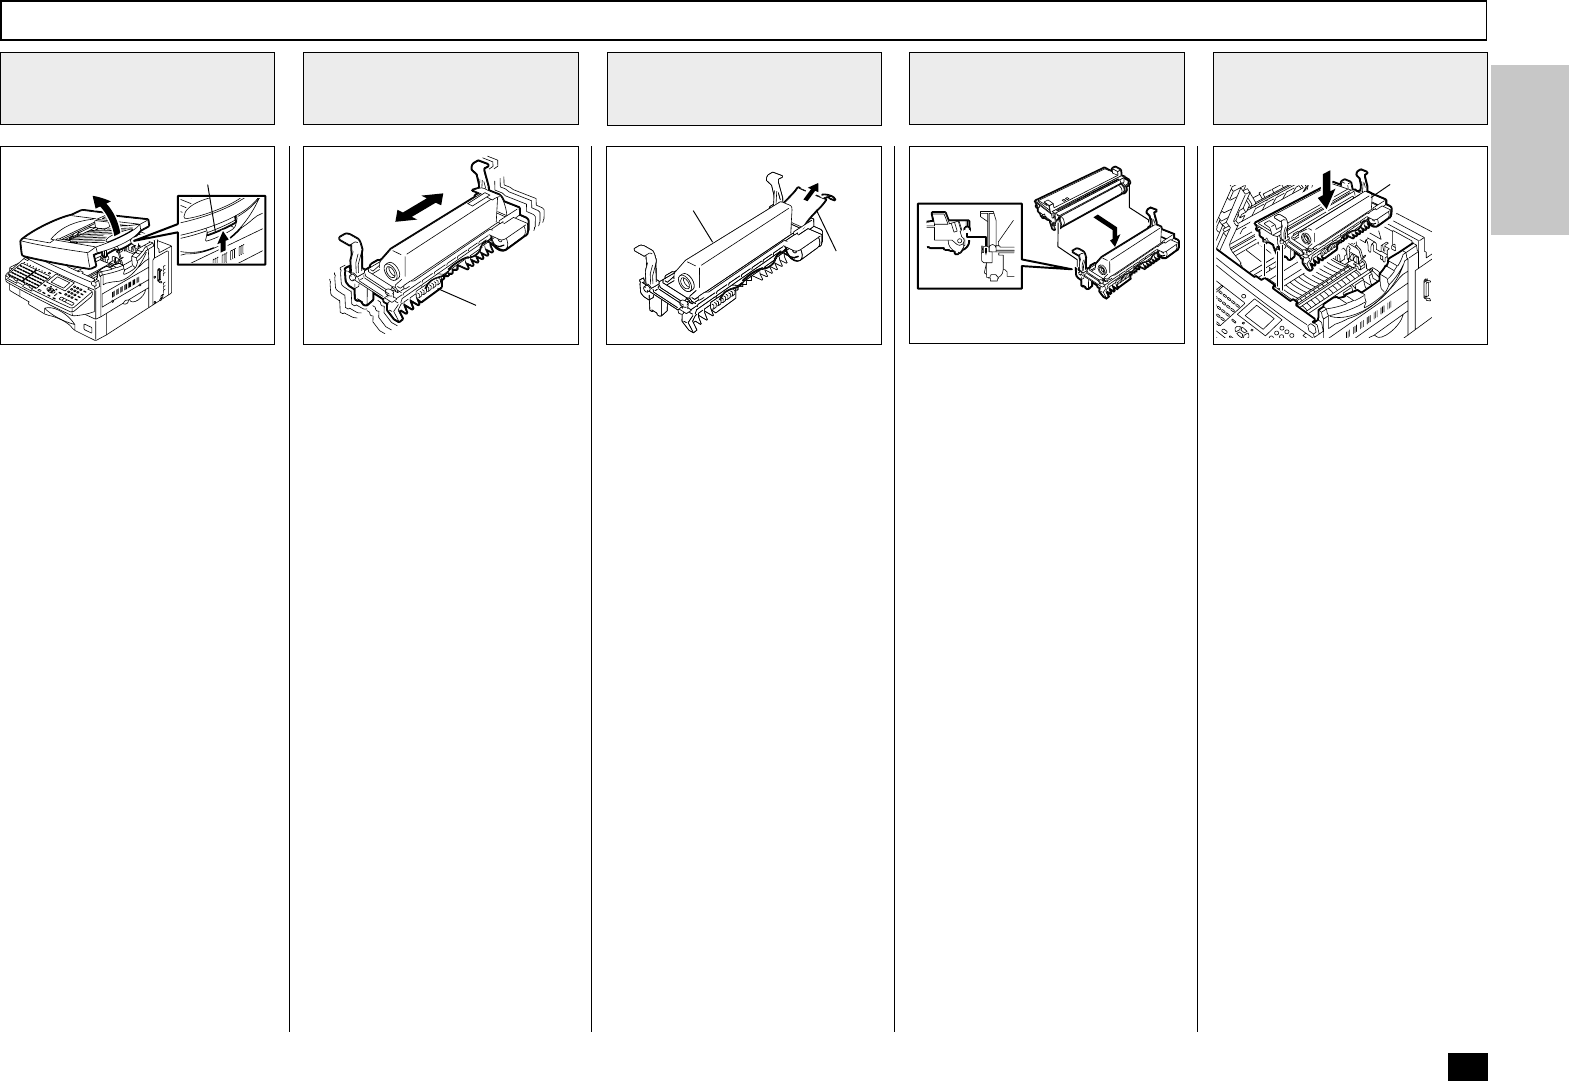
Grasp the Top Cover Release
Lever to open the Top Cover.
Attach the Drum Unit to the De-
veloper Assembly. Position the
Drum Unit with the green Drum
surface facing the Toner Roller
on the Developer Assembly.
IMPORTANT:
• Never touch the photo-
conductive drum (the
green surface) of the
Drum Unit. If the surface
is scarred or scratched, it
will cause print quality
problems.
• Do not expose the photo-
conductive drum of the
Drum Unit to light for
more than 3 minutes. If
the Drum Unit is to be left
anywhere outside the fac-
simile, be certain to cover
it with cloth, paper, etc.
Hold the Developer Assembly
with both hands and shake the
cartridge back and forth several
times.
Holding the Developer Assem-
bly with one hand, grasp the
end of the protective strip under
the Toner Cartridge. Pull the
strip firmly to completely remove
it from the Toner Cartridge.
• The sealing film will contain
a small amount of toner on
its surface.
Carefully dispose of the film
in an appropriate waste re-
ceptacle to avoid soiling
items it may come in contact
with.
Open the Top Cover
1
Shake the Developer
Assembly
2
Remove the
Protective Strip
3
Install the Developer Assembly
(with Drum Unit attached) into
the machine.
Holding the Developer Assem-
bly by the green handles, align
the three shafts on the Devel-
oper Assembly sides with the
slots in the machine frame.
Install the Developer
Assembly with Drum
Unit
5
Developer Assembly and Drum Unit Installation
Developer
Assembly
Drum Unit
Developer
Assembly
Top Cover
Release Lever
Developer
Assembly
Strip
Developer
Assembly
037 040
041 042
043
Attach the Drum Unit
to the Developer
Assembly
4


