5-5
The Toolbar
Redefining The Toolbar
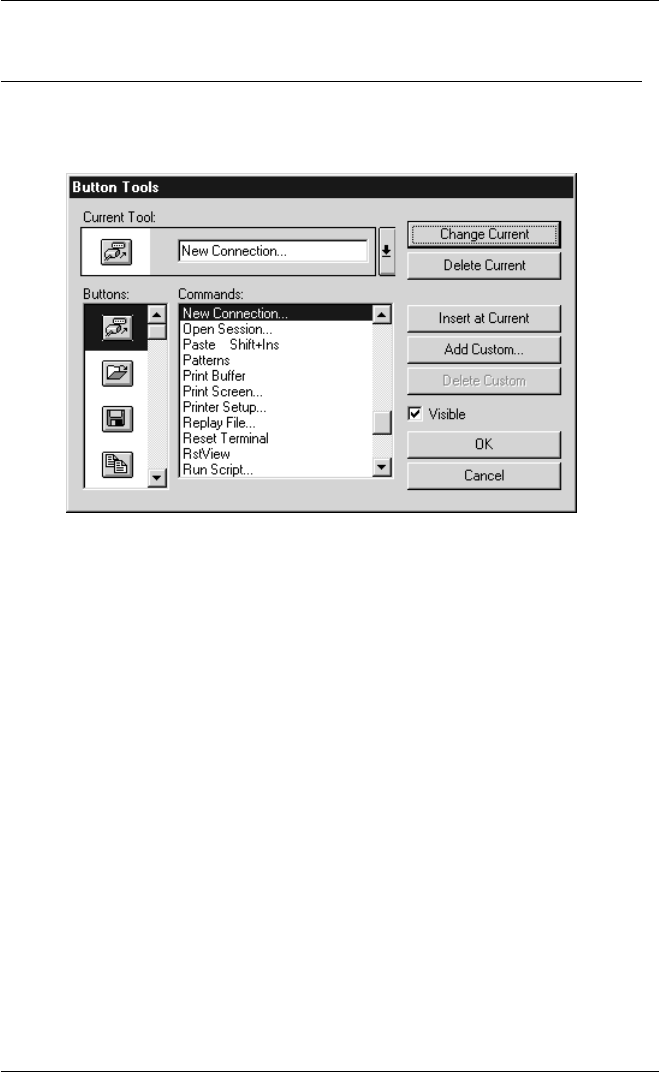
Clicking the last button in the default toolbar, or selecting Button Tools from the
Settings menu will display a dialog box which enables you to redefine the toolbar.
Up to 64 button tools can be defined, all of which can be displayed in the floating
button palette but only one row of buttons can be displayed in the toolbar. The
maximum number of buttons that can be displayed in the toolbar depends on the
display resolution and the size of the window.
A button tool is defined in two stages. The first stage is to specify the button bitmap
for display in the toolbar and the second stage is to assign a function to it.
Adding Button Bitmaps
Clicking the arrow button in the Current Tool box will display a list box showing all
the button bitmapss in the order displayed in the toolbar, together with their
functions. The Current Tool will be highlighted in this list. When you add a new
button to the toolbar it is positioned to the left of the button currently selected in this
list. Select the current tool then close the list box by clicking the arrow button again.
To add a new button, select a button bitmap from the Buttons list box then click the
Insert at Current button. Note that the function of this new button will be the same
as that of the previously selected button tool until you redefine it. You can insert a
space before the current button tool as it is displayed in the toolbar by selecting
[Space] in the Commands list box then clicking the Insert at Current button.
