


4-9
ENG
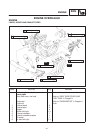
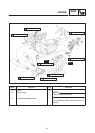
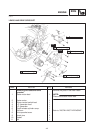
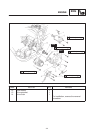
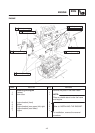
CAMSHAFTS
NOTE:
NOTE:
NOTE:
CAUTION:
EAS00199
REMOVING THE CAMSHAFTS
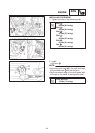
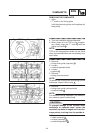
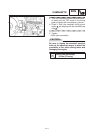
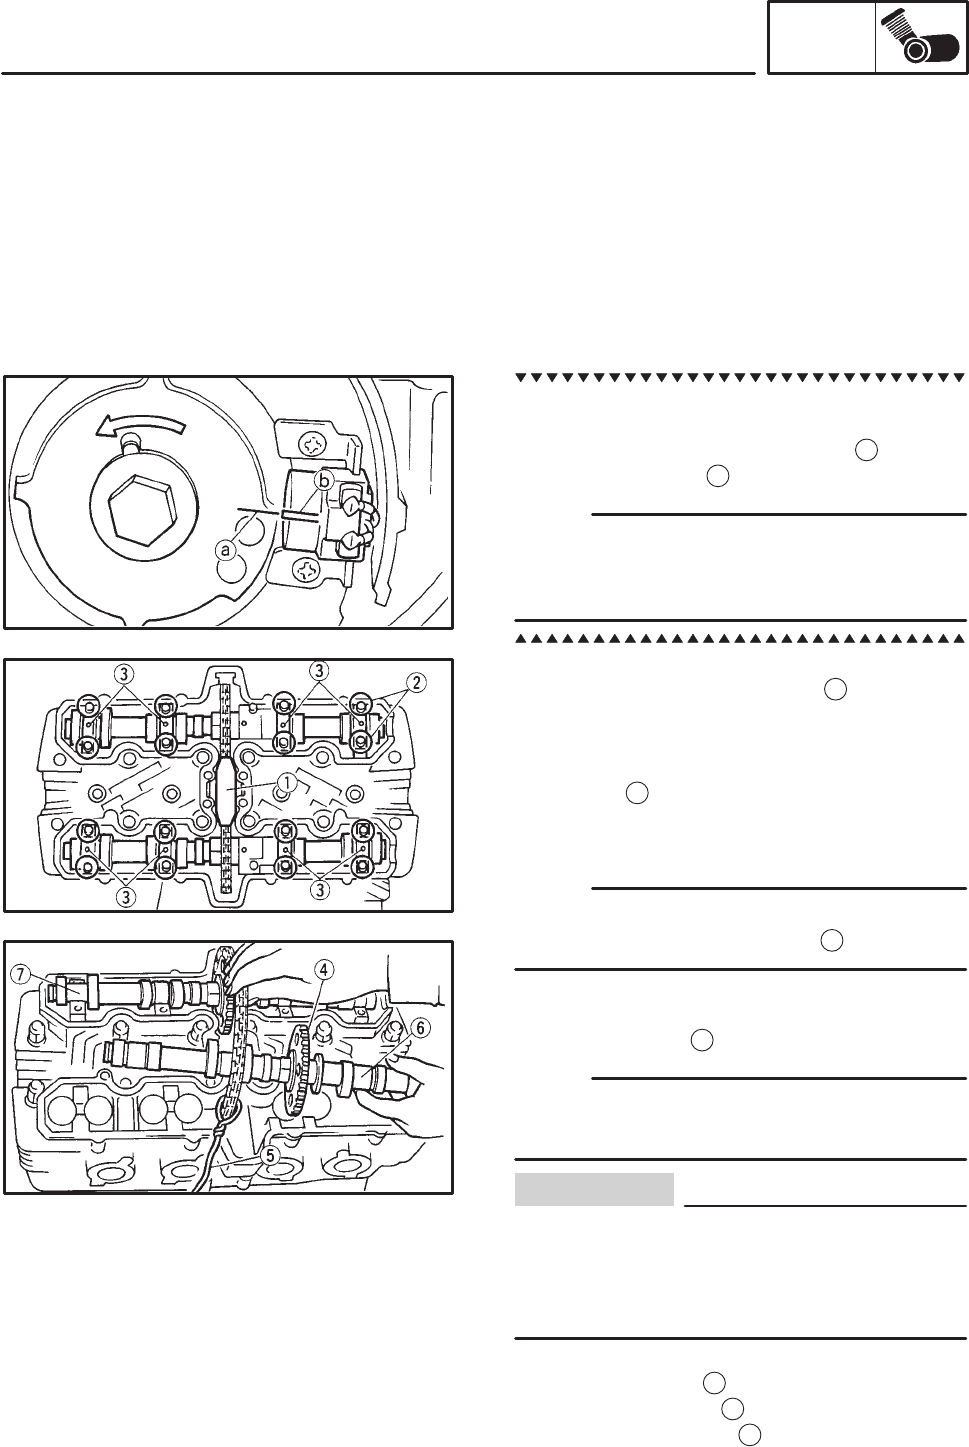
1. Align:
S“T” mark on the timing plate
(with the stationary pointer on the pickup coil
base plate)
a. Turn the crankshaft counterclockwise.
b. When piston #1 is at TDC on the compres-
sion stroke, align the “T” mark
a
with the
pickup coil mark
b
.
TDC on the compression stroke can be found
when the camshaft lobes are turned away from
each other.
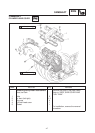
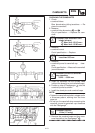
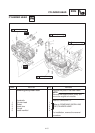
2. Remove:
Stiming chain guide (top side)
1
3. Loosen:
Scamshaft sprocket bolts
4. Loosen:
Scap bolt
2
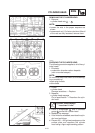
5. Remove:
Stiming chain tensioner
To prevent the timing chain from falling into the
crankcase, fasten it with a wire
5
.
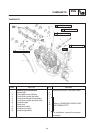
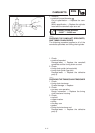
6. Remove:
Stiming chain guide (exhaust side)
Scamshaft caps
3
For reference during installation, put identifica-
tion marks on each camshaft cap.
To prevent damage to the cylinder head,
camshafts or camshaft caps, loosen the
camshaft cap bolts in stages and in a criss-
cross pattern, working from the outside in.
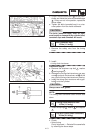
7. Remove:
Sintake camshaft
6
Sexhaust camshaft
7
Scamshaft sprockets
4