


6-66
CHAS
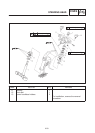
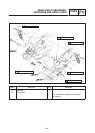
REAR SHOCK ABSORBER,
SWINGARM AND DRIVE CHAIN
NOTE:
CAUTION:
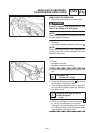
4. Check:
Sdust covers
1
Swashers
2
Damage/Wear ! Replace.
Sbearings
3
Damage/Pitting ! Replace.
Sbush
4
Damage/Scratches ! Replace.
EAS00709
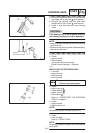
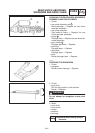
CHECKING THE DRIVE CHAIN
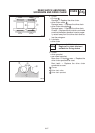
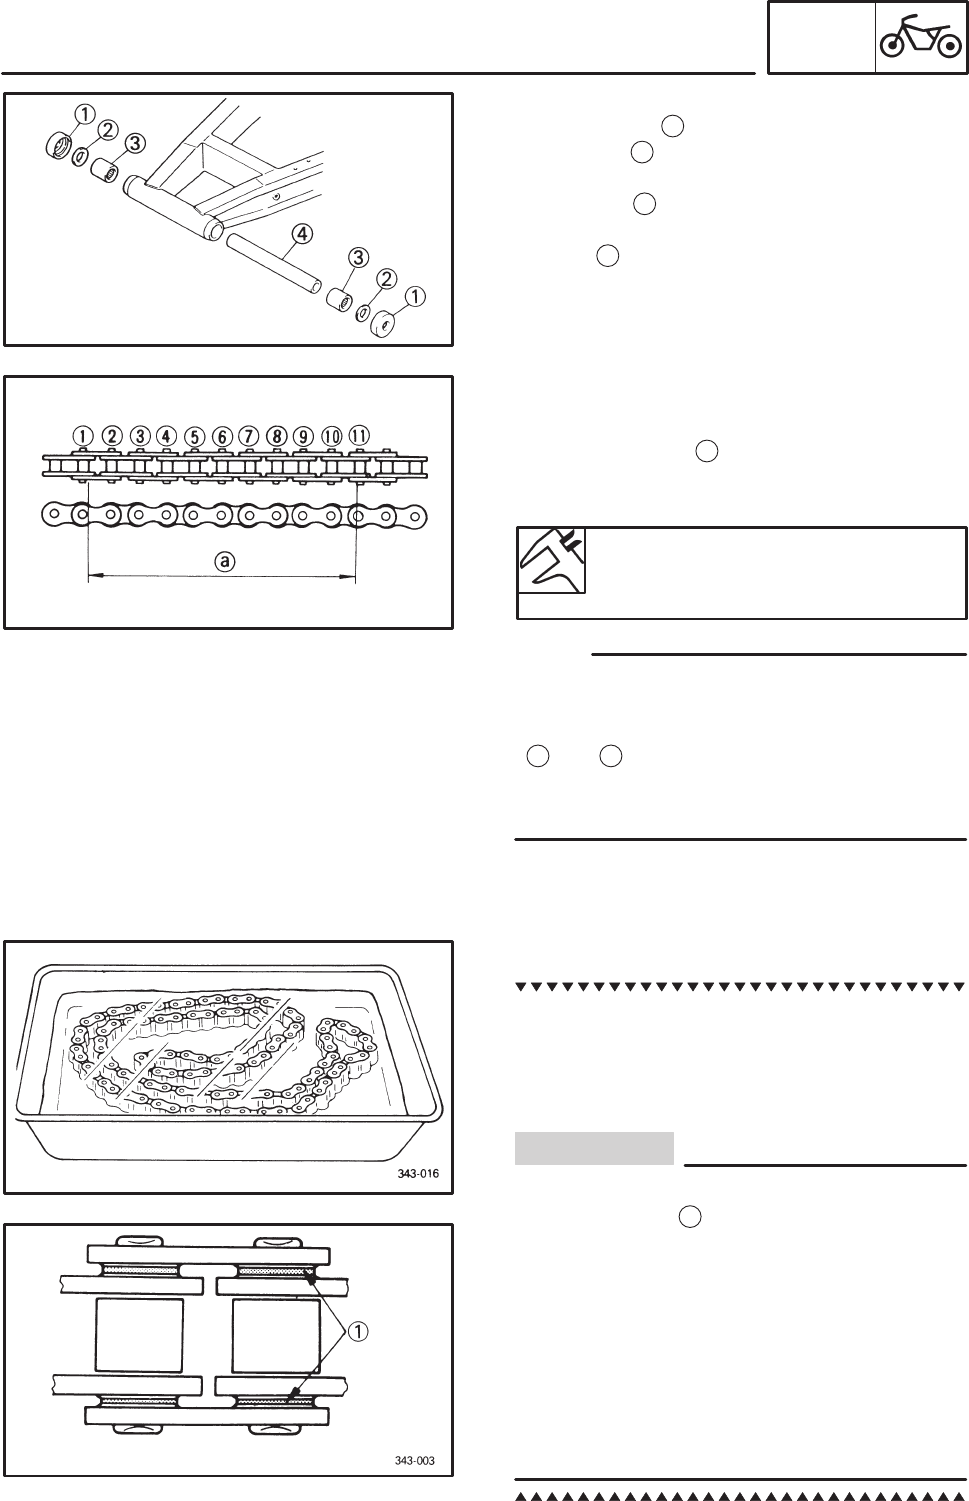
1. Measure:
Sten-link section
a
of the drive chain
Out of specification ! Replace the drive
chain.
Ten-link drive chain section limit
(maximum)
150 mm
SWhile measuring the ten-link section, push
down on the drive chain to increase its tension.
SMeasure the length between drive chain roller
1
and
11
as shown.
SPerform this measurement at two or three dif-
ferent places.
2. Check:
Sdrive chain
Stiffness ! Clean and lubricate or replace.
3. Clean:
Sdrive chain
a. Wipe the drive chain with a clean cloth.
b. Put the drive chain in kerosine and remove
any remaining dirt.
c. Remove the drive chain from the kerosine
and completely dry it.
This motorcycle has a drive chain with small
rubber O-rings
1
between the drive chain
side plates. Never use high-pressure water
or air, steam, gasoline, certain solvents
(e.g., benzine), or a coarse brush to clean
the drive chain. High-pressure methods
could force dirt or water into the drive
chain’s internals, and solvents will deterio-
rate the O-rings. A coarse brush can also
damage the O-rings. Therefore, use only
kerosine to clean the drive chain.