2-29
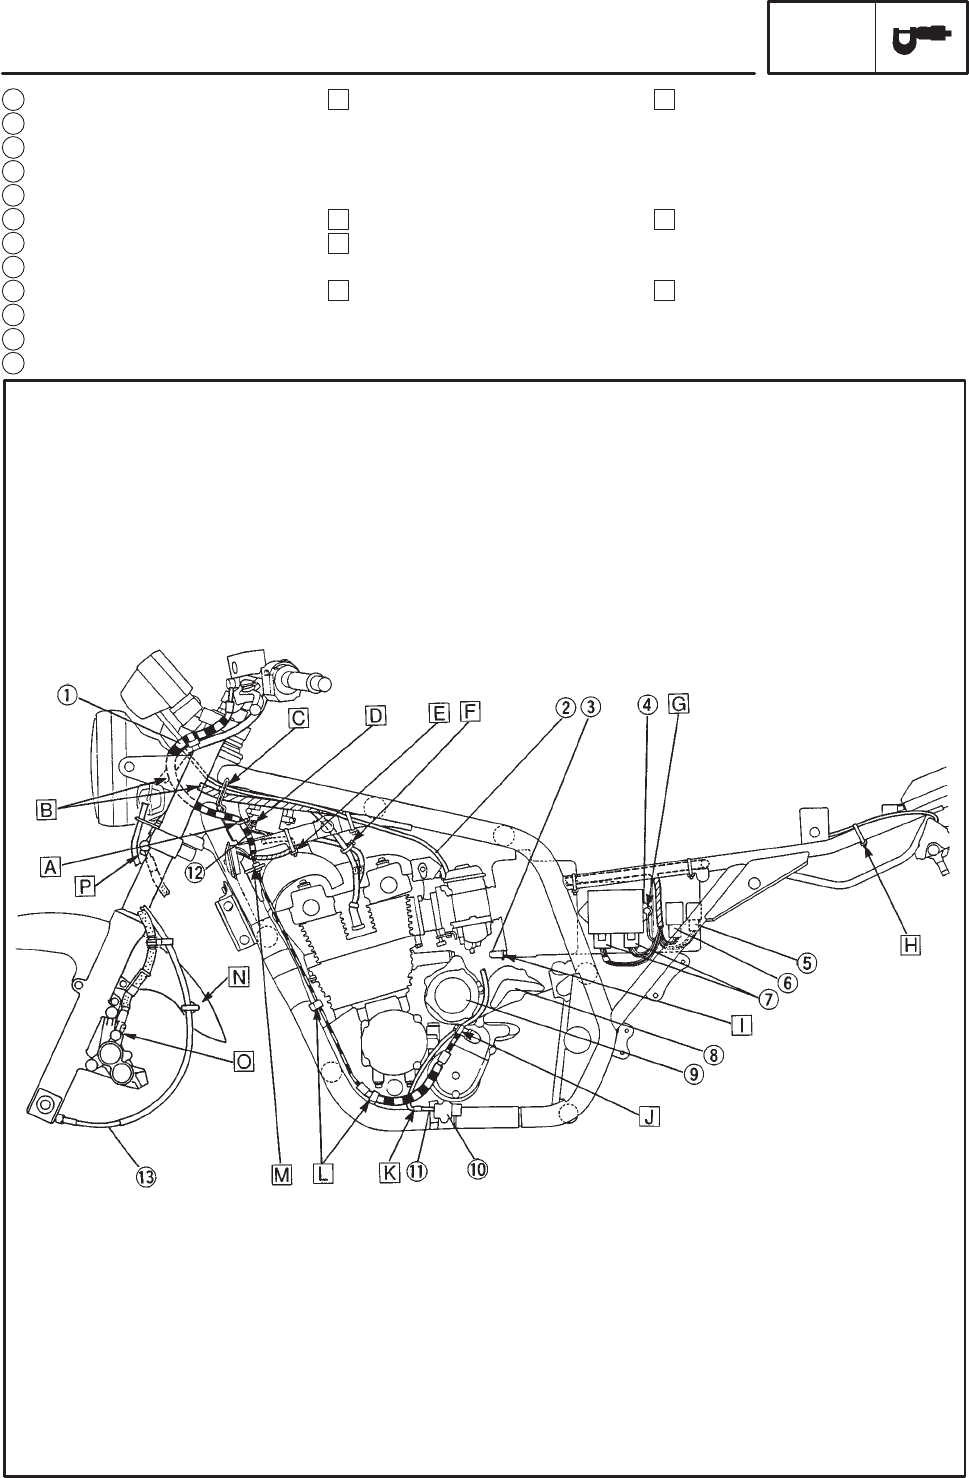
E Fasten the high tension cables
(#1, 2) with a plastic clamp. Posi-
tion the clamp at 50 – 80 mm
above the high tension cable
number.
F Fasten the horn lead to the frame
with a plastic band. Make sure
that the end of band down ward.
G Install the frame ground and ig-
niter unit together with screw.
A Insert the plastic band through
the hole of plastic panel and then
fasten the clutch hose with it.
Make sure that the end of band
inside of motorcycle.
B To headlight lower hole.
C Route the wireharness and start-
er cable through the guide.
D Connect the ignition lead with
white marking tape to the ignition
coil (#1, 4).
1 Clutch hose
2 Starter cable
3 Air filter case drain hose
4 Frame ground
5 Flasher relay connector
6 Oil light relay connector
7 Igniter unit connectors
8 Starter motor
9 AC generator
10 Sidestand switch
11 Sidestand switch lead
12 Ignition coil lead (#1, 4)
SPEC
CABLE ROUTING


