


4-77
CAUTION:
ENG
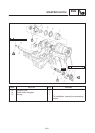
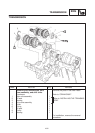
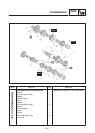
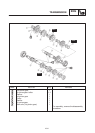
CRANKSHAFT
NOTE:
NOTE:
CAUTION:
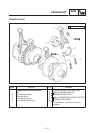
Do not interchange the big end bearings and
connecting rods. To obtain the correct crank-
shaft-pin-to-big-end-bearing clearance and
prevent engine damage, the big end bear-
ings must be installed in their original posi-
tions.
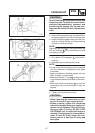
a. Clean the big end bearings, crankshaft pins,
and bearing portions of the connecting rods.
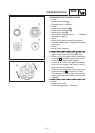
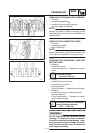
b. Install the big end upper bearing into the con-
necting rod and the big end lower bearing
into the connecting rod cap.
Align the projections
a
on the big end bearings
with the notches
b
in the connecting rod and
connecting rod cap.
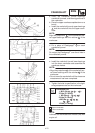
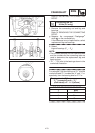
c. Put a piece of Plastigauge
1
on the crank-
shaft pin.
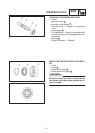
d. Assemble the connecting rod halves.
SDo not move the connecting rod or crankshaft
until the clearance measurement has been
completed.
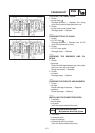
SApply molybdenum disulfide grease onto the
bolts, threads, and nuts seats.
SMake sure that the “Y” mark
c
on the connect-
ing rod faces towards the left side of the crank-
shaft.
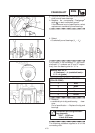
SMake sure that the characters
d
on both the
connecting rod and connecting rod cap are
aligned.
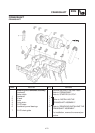
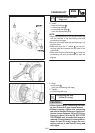
e. Tighten the connecting rod nuts.
SWhen tightening the connecting rod nuts,
be sure to use an F-type torque wrench.
SWithout pausing, tighten the connecting
rod nuts to the specified torque. Apply con-
tinuous torque between 2.0 and 3.6 mSkg.
Once you reach 2.0 mSkg, DO NOT STOP
TIGHTENING until the specified torque is
reached. If the tightening is interrupted be-
tween 2.0 and 3.6 mSkg, loosen the con-
necting rod nut to less than 2.0 mSkg and
start again.