Agilent E5250A User’s Guide, Edition 9 9-27
Executing Sample Programs
HCI Measurement Program
Executing the Program
You should have already added the bias source control routine and set up the
measurement environment as described previously.
Before running the program, do following:
1. Set the GPIB address of instruments as follows:
• 4155/4156: 717
• E5250A: 722
• Bias Source: Set the GPIB addresses to match your control routine
(Address 701 to 703 are defaults used in SP_MUX_M program)
2. Turn on all instruments and the computer.
3. Boot up HP BASIC operating system.
4. Insert a diskette into the computer's disk drive. The diskette must contain the
HCI test program (SP_MUX in this example) you modified in “Adding the Bias
Source Control Routine” on page 9-23.
5. Specify the computer's mass storage device (disk drive) the diskette is inserted
by using MSI statement. For example, if the device is ":CS80,702,1", enter the
following command:
MSI ":CS80,702,1"
6. Load your HCI test program. The following example loads and displays
SP_MUX program, in this example.
LOAD "SP_MUX"
EDIT
7. Insert the E5250A Program Disk into the 4155/4156's disk drive, then get the
setup file IDVD.MES to set up the 4155/4156.
8. Enter the following command from the command line of the computer:
OUTPUT 722;":ROUT:CLOS (@10101,20101,30101)"
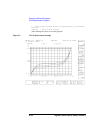
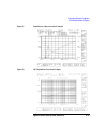
9. Press Single key on the 4155/4156's front panel. The Id-Vds measurement is
performed and the Id-Vds measurement result is displayed as shown in Figure
9-5.
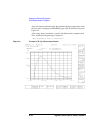
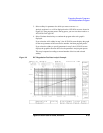
10. Determine the drain stress voltage (Vdstr) from the above curve.
Recommended maximum value is about 0.5 V below actual breakdown. Then,
edit the HCI test program (SP_MUX in this example) , and define the Vdstr
value. The value should be defined in the following program line.


